

Is your heater struggling to keep your home warm? Many homeowners face frustrating breakdowns during colder months, often caused by neglecting important maintenance tasks. This blog post provides essential DIY heater maintenance tips to prevent costly repairs, focusing on conducting regular visual inspections, cleaning key components like the thermocouple and hoses, and troubleshooting common issues with parts such as valves and heat pumps. By following these tips, readers can help extend the lifespan of their heaters and save money on unexpected repair costs.
Key Takeaways
- prioritize safety by disconnecting power and fuel supplies before maintenance
- wear gloves and goggles to protect against injury during DIY maintenance tasks
- ensure adequate ventilation to prevent harmful gas buildup while servicing heating systems
- inspect and clean essential components regularly to maintain heater efficiency and longevity
- schedule routine maintenance checks to identify issues before they become costly problems
Prioritize Safety Before Starting Maintenance

Prioritize Safety Before Starting Maintenance
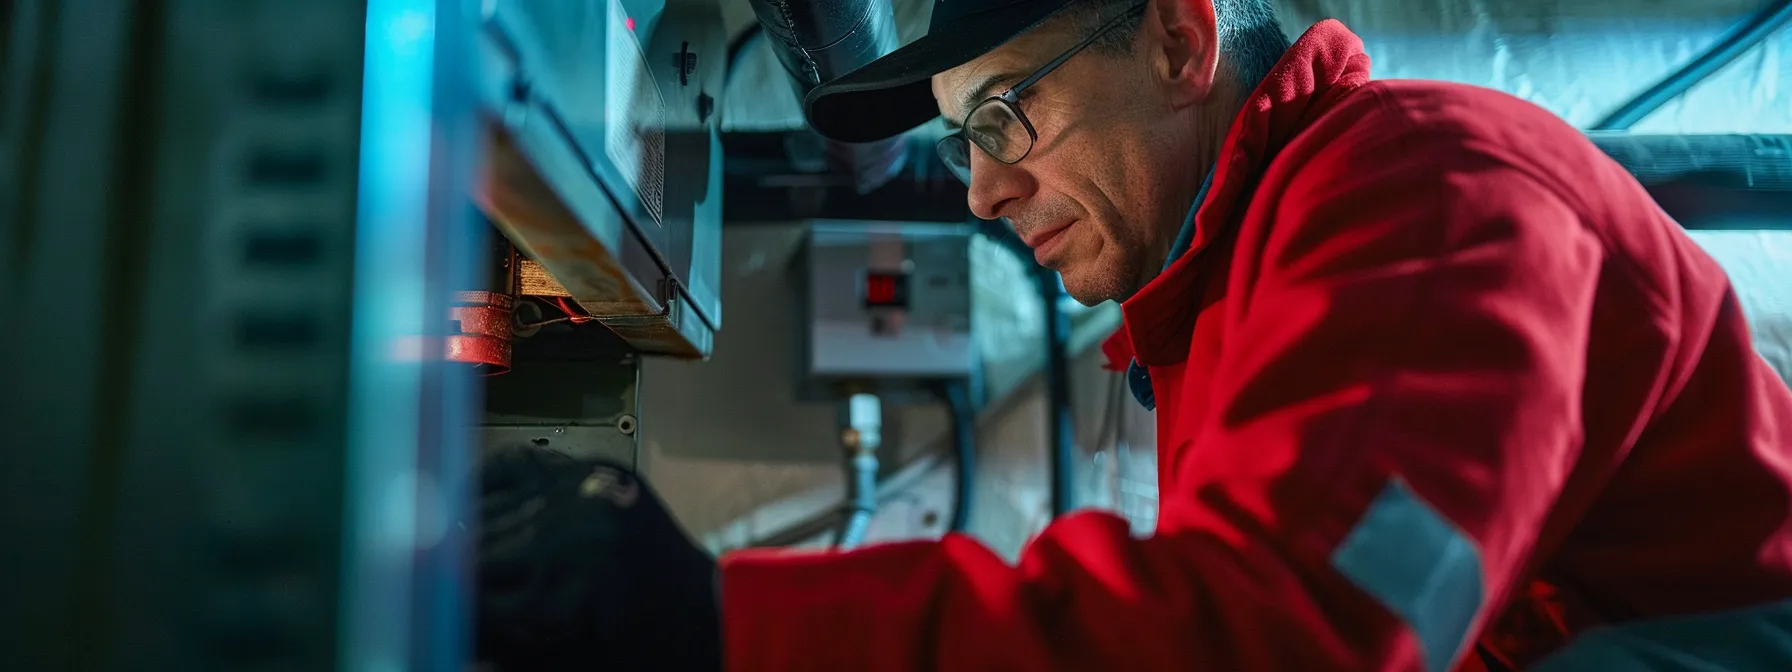
Before conducting any DIY heater maintenance, it is vital to prioritize safety. Begin by disconnecting power and fuel supplies to your HVAC system, ensuring no energy sources pose a risk during maintenance. Wearing appropriate protective gear, like gloves and goggles, can prevent injury. Lastly, ensuring adequate ventilation will mitigate the chance of corrosion and harmful fumes, especially around furnace burners.
Disconnect Power and Fuel Supplies
Before starting any maintenance on a gas water heater or HVAC system, disconnecting the power supply and fuel lines is essential for safety and efficiency. This step minimizes the risk of accidental activation of the system, which could lead to injuries or equipment damage. While performing HVAC maintenance tasks, such as cleaning or inspecting the pump, ensuring these energy sources are turned off allows for safer handling and a more thorough job.
| Steps for Safety | Details |
|---|---|
| Disconnect Power | Turn off the circuit breaker to prevent accidents. |
| Shut Off Fuel Supply | For gas appliances, close the gas supply valve. |
| Wear Protective Gear | Use gloves and goggles to avoid injury. |
| Ensure Ventilation | Keep the area well-ventilated to avoid harmful fumes. |
Wear Appropriate Protective Gear
Wearing appropriate protective gear is a crucial step in ensuring safety during DIY heater maintenance. When cleaning a furnace or inspecting ducts, using gloves and goggles helps protect against sharp edges or flying debris. Furthermore, these precautions are essential for preventing exposure to carbon buildup and harmful fumes that could arise from issues like a malfunctioning pilot light, creating a safer work environment.
| Steps for Safety | Details |
|---|---|
| Disconnect Power | Turn off the circuit breaker to prevent accidents. |
| Shut Off Fuel Supply | For gas appliances, close the gas supply valve. |
| Wear Protective Gear | Use gloves and goggles to avoid injury. |
| Ensure Ventilation | Keep the area well-ventilated to avoid harmful fumes. |
Ensure Adequate Ventilation
Ensuring adequate ventilation is essential during any do-it-yourself water heater maintenance. Proper airflow helps to prevent the buildup of harmful gases that can escape from the flue pipe, particularly in gas models. For instance, a tankless water heater requires sufficient ventilation to operate efficiently and ensure the safety of the household. Regularly checking sensors and confirming that vents are clear can prevent issues that lead to costly repairs down the line.
- Disconnect power and fuel supplies before maintenance.
- Wear appropriate protective gear, such as gloves and goggles.
- Ensure adequate ventilation to avoid harmful gas buildup.
With safety ensured, it is time to look deeper. Understanding your heater’s components will reveal what truly keeps your home warm and comfortable.
Understand Your Heater's Components
Understanding the main components of a heater is vital for effective DIY maintenance. Identify key parts such as the flame sensor, filters, and bearings to ensure optimal functionality. Learning each component’s role helps in recognizing signs of wear and tear, while keeping the system free from debris can prevent costly repairs. This knowledge lays the groundwork for more detailed inspections and maintenance practices.
Identify the Main Parts of Your Heater
Every home heating system comprises essential components that work together to ensure efficient operation. For example, in a furnace, the flame sensor plays a critical role in safety by detecting whether the burner is lit, while the heat pump functions as the heart of a central heating system, providing warmth during colder months. Understanding these parts is vital for homeowners conducting furnace maintenance or home inspections, as it allows them to identify potential problems, such as carbon monoxide leaks, and apply tips for repairs early on, ultimately preventing costly repairs down the road.
Learn the Function of Each Component
Learning the function of each component in a water heater is crucial for effective maintenance. The water heater tank holds and heats the water, while the thermostat controls the temperature settings; understanding these elements helps homeowners ensure their system operates efficiently. Additionally, recognizing the role of safety features, like the circuit breaker, prevents potential hazards and allows for quick responses in case of issues, ultimately leading to better performance and fewer costly repairs in their HVAC unit.
Recognize Signs of Wear or Damage
Recognizing signs of wear or damage in a furnace is critical for maintaining its efficiency and longevity. Homeowners should regularly inspect the air filter for dirt and debris; a clogged filter can restrict airflow and force the system to work harder, increasing energy bills. Additionally, visible rust or strange noises may indicate deeper issues, and timely action—such as using a vacuum to clear dust from components or a brush to clean coils—can prevent costly repairs down the line.
- Inspect the air filter regularly for dirt and debris.
- Check for visible rust or corrosion on components.
- Listen for unusual noises during operation.
- Use a vacuum to clear dust and a brush for coils.
- Schedule annual maintenance to catch issues early.
Understanding the parts of your heater is just the beginning. Next, keeping an eye on its condition will help you spot potential problems before they turn serious.
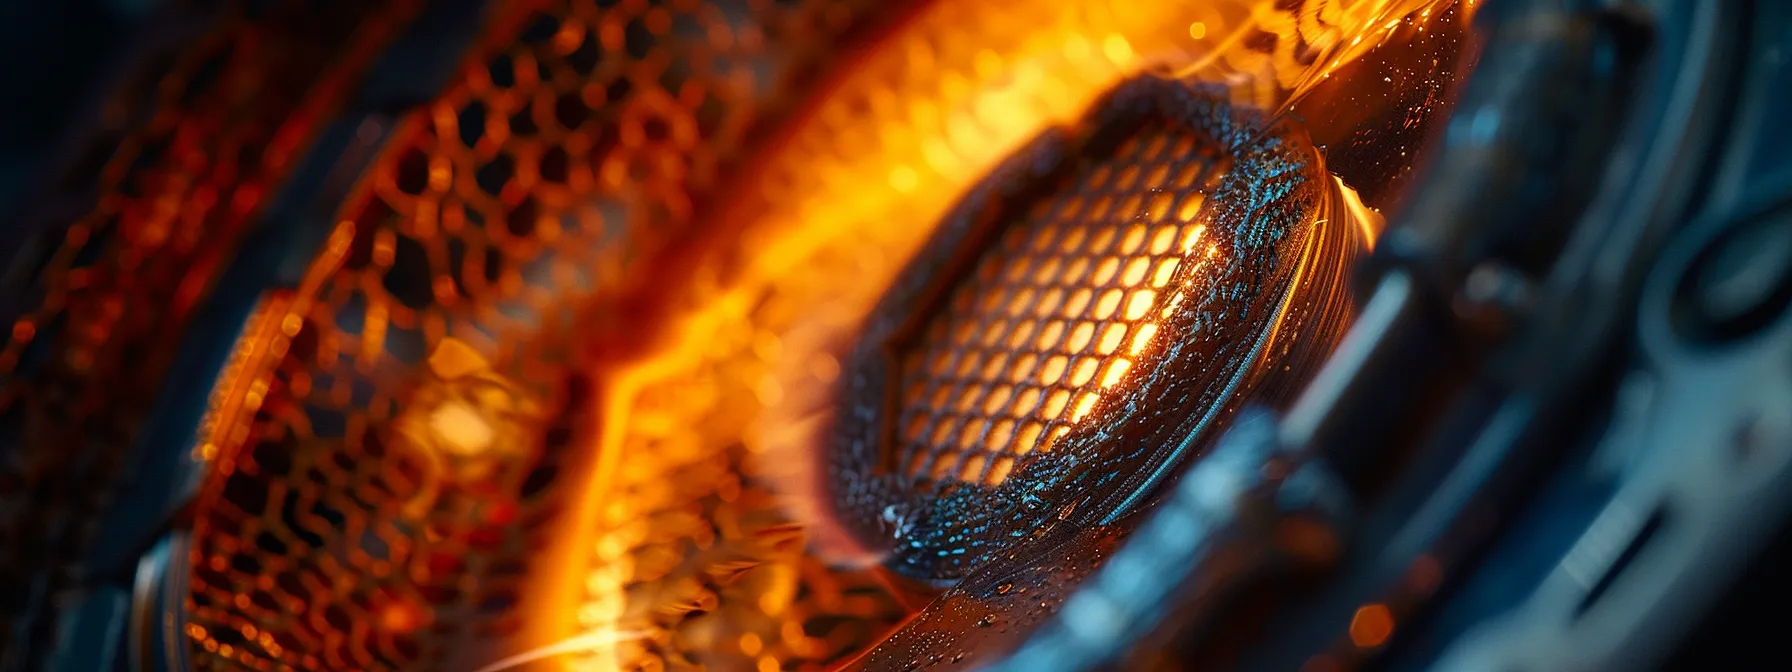
Conduct Regular Visual Inspections
Regular visual inspections are essential in DIY heater maintenance to catch potential issues before they lead to costly furnace repairs. Homeowners should check for visible leaks or corrosion, inspect the flue and ventilation system, and examine the pilot light or ignition system. These straightforward actions help maintain the combustion chamber‘s efficiency and ensure safe operation, preventing unexpected breakdowns.
Check for Visible Leaks or Corrosion
Checking for visible leaks or corrosion is a crucial part of DIY heater maintenance. Homeowners should regularly inspect areas around the pressure relief valve and fittings, as leaks can lead to emergency situations if not addressed promptly. Using a screwdriver, one can easily tighten loose connections or replace any compromised wire insulation to prevent leaks that could escalate into more serious problems.
Inspect the Flue and Ventilation System
Inspecting the flue and ventilation system is a vital aspect of DIY HVAC maintenance that homeowners should not overlook. Properly functioning ventilation is essential for safely venting combustion gases, whether from oil, propane, or natural gas heaters. Regular checks can help prevent blockages that may cause a dangerous buildup of carbon monoxide, ensuring the system operates efficiently and maintains safe temperatures, ideally within a comfortable range measured in Fahrenheit.
Examine the Pilot Light or Ignition System
Examining the pilot light or ignition system is essential for maintaining a reliable heating system. Homeowners should regularly check for soot buildup, which can indicate a problem with the burner and may affect indoor air quality. A consistent flame quality ensures that the natural gas burns safely and efficiently, helping to maintain warranty coverage and preventing costly repairs down the line:
| Inspection Steps | Details |
|---|---|
| Check Flame Color | Ensure the flame is blue; a yellow or orange flame may indicate soot buildup. |
| Clean Around the Pilot Light | Remove debris that can obstruct the flame or cause airflow issues. |
| Review the Manual | Refer to the heating system manual for specific pilot light maintenance requirements. |
After completing visual inspections, the next step is clear. It’s time to clean and replace essential parts to keep your HVAC system running smoothly.
Clean and Replace Essential Parts

To ensure the optimal performance of heating systems, cleaning or replacing essential parts is critical. Homeowners should regularly check air filters, remove dust from vents and ducts, clean burners and heating elements, and lubricate moving parts where applicable. Addressing these areas will help maintain efficiency, enhance combustion quality, and prolong the lifespan of the heat exchanger and boiler, preventing costly repairs down the line.
How to Clean or Replace Air Filters
To maintain optimal airflow and efficiency in furnaces, homeowners should regularly clean or replace air filters as part of their DIY heater maintenance routine. This process typically involves removing the old filter and using a vacuum cleaner to clear any dust or debris from the surrounding area before inserting a new, clean filter. Regularly checking and replacing filters not only improves the performance of the heating system but also extends its lifespan by preventing strain on the components, ultimately saving money on costly repairs in the long run.
Remove Dust From Vents and Ducts
Removing dust from vents and ducts is an essential part of DIY HVAC maintenance that homeowners should not overlook. Accumulated dirt can restrict airflow, causing the furnace filter to work harder and leading to increased energy bills. Regularly cleaning these areas not only improves system efficiency but also enhances indoor air quality, which is crucial for a comfortable living environment. Additionally, while maintaining the HVAC system, homeowners should ensure to check the water heater drain and chimney for any blockages that could impact overall performance.
Clean Burners and Heating Elements
Cleaning burners and heating elements plays a vital role in maintaining heating system efficiency and preventing costly repairs. Regular inspection of these components ensures that soot, dust, or debris do not obstruct the flame, which can lead to inefficient heating and increased energy costs. Homeowners can enhance performance by applying a suitable lubricant to moving parts and ensuring all connections, including pipes, are secure. This attention to detail not only optimizes the operation of the programmable thermostat but also extends the lifespan of the heating system, ultimately providing peace of mind and a comfortable home environment.
Lubricate Moving Parts Where Applicable
Lubricating moving parts in water heating systems, such as pumps and fans, is a vital aspect of heater maintenance. This simple task helps reduce friction, which can lead to wear and tear, and prevents dust buildup that may obstruct airflow. By ensuring that these components operate smoothly, homeowners can not only improve energy efficiency but also reduce the risk of carbon monoxide leaks and the need for costly water heater repairs:
- Check moving parts for signs of wear.
- Use appropriate lubricants recommended for HVAC systems.
- Regularly clean dust and debris from the surrounding areas.
- Inspect the radiator for proper function and lubrication.
After cleaning and replacing essential parts, problems may still arise. It’s time to troubleshoot common heater issues, ensuring warmth returns to your home.
Troubleshoot Common Heater Issues

Homeowners can effectively troubleshoot common heater issues to maintain comfort and efficiency. Key topics include resolving unusual noises or smells, addressing inconsistent heating, fixing thermostat malfunctions, and resetting tripped circuit breakers. These practical insights will equip homeowners with the knowledge needed to recognize and address heater problems, ultimately enhancing performance and reducing the need for HVAC Services.
Resolve Unusual Noises or Smells
Unusual noises or smells coming from a heater often signal underlying issues that need attention. Homeowners should take note of any grinding, hissing, or popping sounds, as these can indicate problems like loose parts, air leaks, or a failing component. Additionally, any strange odors, especially the scent of gas or burning dust, should prompt immediate action to check the system’s safety, possibly by contacting a professional for further inspection to prevent costly repairs and ensure the heater operates efficiently.
Address Inconsistent Heating
Inconsistent heating in a home can be frustrating and may result from various issues, such as clogged air filters, blocked vents, or improper thermostat settings. Homeowners should first check the air filter for dirt and replace it if necessary, as a clean filter allows for proper airflow and enhances the heating system‘s efficiency. Additionally, ensuring that vents are not obstructed by furniture or debris can improve heat distribution throughout the home, leading to a more comfortable environment. Here are some steps to address inconsistent heating:
- Inspect and replace dirty air filters regularly.
- Clear vents and registers from obstructions.
- Verify thermostat settings and adjust if needed.
- Check for trapped air in the heating system.
Fix Thermostat Malfunctions
Fixing thermostat malfunctions is crucial for ensuring efficient heater performance. Homeowners should begin by checking the thermostat settings to confirm they align with the desired temperature. If the thermostat is not responsive, replacing the batteries or recalibrating the device can often resolve the issue, leading to consistent heating throughout the home:
- Check thermostat settings for accuracy.
- Replace batteries if the thermostat is unresponsive.
- Recalibrate the device for optimal performance.
- Inspect wiring and connections to rule out faults.
Resetting Tripped Circuit Breakers
Resetting tripped circuit breakers is an essential step in maintaining the efficiency of a home heater. Homeowners should first locate the electrical panel and identify the breaker that has tripped, indicated by a switch that is in the ‘off’ position or doesn’t sit flush with the others. Once the correct breaker is found, it can be reset by flipping the switch back to the ‘on’ position, ensuring the heating system resumes normal function. Properly resetting the circuit breaker not only restores power but also can help prevent further electrical issues that could lead to costly repairs:
| Steps to Reset Circuit Breakers | Details |
|---|---|
| Locate the Electrical Panel | Find the home’s main electrical panel, typically in the basement, garage, or utility area. |
| Identify the Tripped Breaker | Look for a switch that is either ‘off’ or not aligned with other breakers. |
| Reset the Breaker | Flip the switch back to the ‘on’ position to restore power to the heater. |
| Check the Heater Function | Ensure that the heating system starts operating normally after resetting. |
Once the common heater issues are resolved, it’s time to think about keeping that heat flowing smoothly for years to come. Simple practices can greatly extend the lifespan of your heater, saving you time and money down the road.
Implement Practices to Extend Heater Lifespan

Implementing effective practices can significantly extend the lifespan of a heating system, preventing costly repairs. Scheduling routine maintenance checks ensures optimal functionality, while sealing gaps prevents heat loss and enhances efficiency. Additionally, optimizing thermostat settings contributes to energy savings, and monitoring energy bills for unusual spikes can indicate underlying issues. These approaches lay the groundwork for a more reliable and efficient heating experience.
Schedule Routine Maintenance Checks
Scheduling routine maintenance checks is a significant practice for extending a heater’s lifespan and preventing costly repairs. Homeowners who regularly inspect and maintain their heating systems can identify small issues before they escalate into major problems. For example, an annual tune-up can enhance efficiency and confirm that all components function correctly, leading to reliable performance during peak usage times.
| Routine Maintenance Practices | Benefits |
|---|---|
| Annual Tune-Ups | Identify and resolve small issues before they become costly repairs. |
| Regular Filter Changes | Enhances airflow and overall system efficiency. |
| Inspections of Ducts and Vents | Prevents blockages and ensures safe operation. |
Seal Gaps to Prevent Heat Loss
Sealing gaps in a home is an essential practice for preventing heat loss, which can significantly enhance the efficiency of a heating system. Homeowners should examine areas around windows, doors, and any ductwork for drafts and apply weather stripping or caulk to create a tight seal. By addressing these gaps, they can maintain a consistent temperature in their homes, reducing energy costs and prolonging the lifespan of their heating systems while avoiding unnecessary repairs.
Optimize Thermostat Settings for Efficiency
Optimizing thermostat settings for efficiency is an essential practice in extending the lifespan of a heating system. Homeowners can achieve this by programming thermostats to lower temperatures during non-peak hours, ensuring that energy is not wasted when spaces are unoccupied. For instance, setting the thermostat back by just a few degrees can lead to noticeable savings on energy bills while maintaining comfort levels when the home is in use.
Monitor Energy Bills for Unusual Spikes
Monitoring energy bills for unusual spikes is a practical approach that homeowners can take to safeguard their heating systems and prevent costly repairs. A significant increase in utility costs can indicate inefficiencies within the heater, such as blocked vents or failing components. By regularly reviewing these bills, homeowners can identify patterns and take prompt action to address potential issues, ensuring their heater operates efficiently and effectively.
- Schedule routine maintenance checks to enhance efficiency.
- Seal gaps to prevent heat loss and reduce energy usage.
- Optimize thermostat settings for energy savings.
- Monitor energy bills for any unusual spikes in costs.
Conclusion
Performing essential DIY heater maintenance is critical for ensuring efficient operation and extending the lifespan of heating systems. Homeowners can significantly reduce the risk of costly repairs by prioritizing safety, understanding their heater’s components, and conducting regular inspections and cleanings. Addressing common issues promptly and implementing proactive practices, such as routine maintenance checks and optimizing thermostat settings, helps maintain comfort and efficiency. By taking these straightforward steps, homeowners not only enhance their HVAC system’s performance but also secure long-term savings and peace of mind.