

Table Of Contents:
Is your heater refusing to start when the cold weather hits? It can be frustrating, especially if you rely on it for warmth. In this troubleshooting guide, you’ll learn the common reasons your heater won’t start, how to check the thermostat, and what to look for regarding the power supply. By following these essential steps from NewRise HVAC, you’ll be equipped to identify and resolve the issue quickly, ensuring your home stays cozy. No one wants to face a chilly evening without a functioning heater, but tackling this problem doesn’t have to be complicated.
Key Takeaways
- Check your thermostat settings first to avoid simple heating issues
- Regularly inspect and replace clogged air filters for optimal airflow
- Always confirm there’s sufficient fuel supply for your heating system
- Keep an eye on strange noises or smells; they may indicate underlying problems
- Don’t hesitate to call in a professional if basic troubleshooting fails
Understand Common Reasons Your Heater Won't Start
If your heater isn’t starting, several common issues might be at play. First, check your thermostat settings, as incorrect adjustments can stop the system from working. Next, power supply problems, like low voltage or tripped breakers, can also interrupt functionality. Clogged filters may restrict airflow while issues with fuel supply or faulty safety sensors could prevent your space heater from operating safely. Understanding these factors can help you decide if you need an HVAC professional from newrisehvac to assist.
Incorrect Thermostat Settings
When your heater isn’t firing up, incorrect thermostat settings are often the first thing to check. If your thermostat is set to “off” or programmed incorrectly, it can prevent your system from engaging. Always ensure the settings reflect your desired temperature; this simple step can save you time and hassle.
Sometimes, an adjustment in the thermostat calibration might be necessary, particularly with older models. If the thermostat‘s reading is off, your heater might struggle to perform effectively. You could end up cranking up the temperature only to find that your gas heater or boiler still isn’t responding due to wrong input.
Lastly, keep an eye out for any debris or dirt around the thermostat that might affect its performance. Dust can inhibit its ability to read accurately, leading to further confusion about why your heater isn’t starting. Cleaning the area around your thermostat helps ensure it’s operating smoothly, making it easier for your compressor to start up when you need heat the most.
Power Supply Problems
Power supply problems rank high on the list of issues when your heater won’t start. If the heater isn’t making any noise at all, it might be due to a tripped circuit breaker or a blown fuse. Start by checking your electrical panel; resetting the breaker or replacing the fuse can often get your heating system up and running again, ensuring proper airflow throughout your home.
In some cases, low voltage may also affect your heater’s performance. If the power supply isn’t sufficient, your heater might struggle to ignite or heat properly. It can be a good idea to have a professional check the wiring and connections leading to your heating unit, particularly if you’ve noticed inconsistent performance or unusual noises coming from the combustion chamber.
Don’t forget to evaluate any associated duct systems as well. Blocked or damaged ducts can disrupt airflow, impacting your heater’s ability to deliver warm air effectively. If you suspect airflow issues, inspecting your ducts for blockages or leaks might help you identify further problems, making it easier to enjoy the comfort of your home once again. If issues persist, reaching out to heating services for assistance can provide the expert help you need.
Clogged Filters
Clogged air filters are often a major reason why your heater refuses to start. When the filters become blocked with dust and debris, airflow is restricted, preventing the system from reaching the desired room temperature. This leads to inefficiencies in the heating process, and your unit may struggle to maintain the warmth you expect.
Regularly checking and replacing air filters is a simple yet crucial step in heater maintenance. If you notice that your heater relies on a pump for circulation, clogged filters can impede its function, causing the system to overheat or fail to operate altogether. Make it a habit to inspect your filters at least once a month during the heating season to keep everything running smoothly.
In cases where you have baseboard heaters, a clogged filter can be particularly detrimental as it might block the necessary airflow essential for even heating. If you suspect the filters are the issue, removing them for a clean-up or replacement is a smart move. This small maintenance task can significantly improve system performance and prolong the lifespan of your heater:
| Potential Issue | Impact | Action |
|---|---|---|
| Clogged Air Filters | Restricted airflow, insufficient heating | Inspect and replace filters regularly |
| Dirty Pump | Reduced efficiency, inability to circulate | Clean or service the pump as needed |
| Baseboard Blockage | Uneven heating, temperature fluctuations | Clear obstructions for optimal airflow |
Issues With Fuel Supply
When your heater fails to start, one common issue could be related to the fuel supply. If you rely on gas or oil and the furnace doesn’t ignite, ensure there’s adequate fuel in the tank or check the gas lines for any leaks. Sometimes, the absence of fuel can halt the entire heating process, so a quick inspection can be a major step in your troubleshooting efforts.
Moreover, if you notice any unusual odors, such as the smell of gas, this could indicate a serious problem. Be cautious, as gas leaks can lead to carbon monoxide buildup, posing a risk to your safety. It’s wise to invest in a carbon monoxide detector if you don’t have one already, as it can provide peace of mind and protect your home from dangerous situations while engaging in your furnace troubleshooting.
Another area to consider is the electrical wiring connected to your heating system. If there are issues with the electrical components that deliver fuel to your heater, this can lead to performance hiccups as well. Ensuring that wiring connections are secure and in good condition can help facilitate a steady fuel supply, allowing your heater to run properly and keep your space warm.
Faulty Safety Sensors
Faulty safety sensors can also lead to your heater not starting. These sensors are designed to ensure safe operation by shutting down the furnace if they detect any unusual conditions, like improper combustion. If the sensors malfunction, they may prevent your system from igniting, causing you to wonder what’s gone wrong with your heating setup.
For instance, if your heat exchanger is not functioning safely, the safety sensors will kick in. This is a protective measure; if something seems off, like unusual gases or overheating, the system will stop to prevent further issues. You can check to see if a reset is needed, but consistently facing this problem suggests that an electrician might need to take a closer look to address any deeper issues.
In some cases, dirt or debris can accumulate around the sensors, causing misreadings. If you suspect this might be the culprit, give the area a quick clean before diving into more complex troubleshooting. Keeping your furnace’s components clean is a straightforward step that can drastically improve performance, ensuring your home stays warm and comfortable during those chilly days.
You’ve learned why your heater may not be starting. Now, let’s move on to steps that will help you check the thermostat and get things back on track.
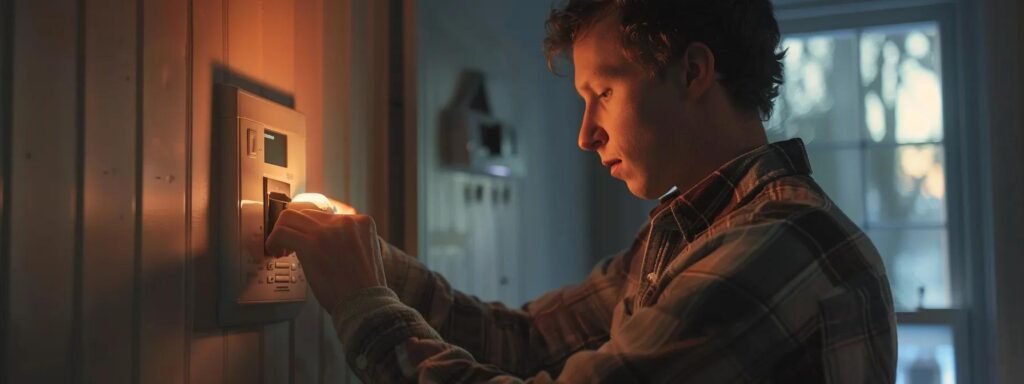
Steps to Check the Thermostat

Steps to Check the Thermostat
Start by confirming the temperature setting on your thermostat to ensure it’s set to your desired warmth. Next, inspect the battery or power supply to rule out electrical issues that could be affecting your heating system. A simple reset might do the trick if you find nothing amiss. Lastly, ensure the thermostat is positioned properly, away from drafts or humidity, for accurate readings.
Confirm the Temperature Setting
To start troubleshooting your heater, the first step is to confirm the temperature setting on your thermostat. Make sure the dial or digital display reflects the warmth you actually want. If the temperature is set too low, your heater simply won’t kick on, which can be an easy fix but is often overlooked.
Next, check to see if the thermostat is operating correctly. Sometimes, issues with power supply can affect the thermostat‘s performance. If the intake is blocked or an air handler isn’t functioning properly, it can make it hard for your system to recognize that it needs to heat your home. In these cases, making adjustments might require inspecting everything from the circuit breaker to the settings on the thermostat.
Lastly, ensure that there is no interference affecting your thermostat‘s ability to read the temperature accurately. Things like drafts or even debris can lead to confusing readings. If your thermostat is powered by an extension cord, verify that it’s in good condition and securely connected to avoid electrical issues that might prevent your heater from starting. Taking these steps can help you avoid unnecessary frustrations as you work to get your heating system back in action.
Inspect the Battery or Power Supply
When you’re troubleshooting why your heater isn’t starting, one key area to examine is the battery or power supply. If your thermostat relies on batteries, a simple dead battery could prevent your ignition system from receiving the signal it needs to kick the heater into action. Make it a habit to check and replace the batteries regularly to ensure everything runs smoothly.
Another crucial point is to inspect the power supply connected to your thermostat. If there’s an issue with the voltage or wiring, your sensor might not function correctly, which can lead to frustration when the heater refuses to start. Check for any loose connections or frayed wires near the power source to eliminate this as a potential problem.
Lastly, don’t forget to consider how dust affects your system. Dust buildup around the thermostat can block airflow and impact its ability to read temperatures accurately. Regularly cleaning the area around both your thermostat and any connected components, like the condenser, will help keep your heating system in top shape and ready to deliver warmth when you need it most.
Reset the Thermostat
If your heater isn’t starting, resetting the thermostat is a simple step that might solve the issue. First, locate the reset button on your thermostat, which is usually found on the device’s main panel. If you have a programmable model, try turning it off and back on to see if that clears any temporary glitches. This quick action can sometimes re-establish communication between the thermostat and your heating system.
For some systems, you may need to reset the limit switch, especially if your thermostat is not receiving power. The limit switch helps prevent overheating by shutting off the heating element when necessary. If you suspect that the limit switch could be at fault, refer to your owner’s manual for specific resetting instructions tailored to your heater setup.
After resetting both the thermostat and the limit switch, check that the propane supply is adequate and that the flue is clear of obstructions. Insufficient fuel or a blocked flue can also prevent your heater from kicking on, and ensuring these elements are intact plays a crucial role in proper heater function. Be proactive in maintaining these components, and your heating system should be able to deliver warmth reliably.
| Step | Description | Action Needed |
|---|---|---|
| Reset the Thermostat | Power cycle the thermostat | Turn off and on |
| Check Limit Switch | Reset the limit switch if needed | Follow the owner’s manual |
| Inspect Propane and Flue | Ensure enough propane and clear flue | Check fuel levels and obstructions |
Ensure Proper Placement of Thermostat
Proper placement of your thermostat can significantly impact the performance of your heating unit. If the thermostat is on an exterior wall or in a location that doesn’t accurately reflect the temperature of the room, it may create a false reading. This leads to inefficient heating, leaving you feeling cold while your system works overtime, which can affect your indoor air quality.
Moreover, consider the influence of drafts and sunlight. If your thermostat is near a window or a drafty area, it might pick up a temperature that’s not representative of the entire room. Positioning it away from such factors ensures it accurately gauges the temperature, reducing the risk of your system running more than needed and prolonging the life of components like the thermocouple.
Finally, ensure that your thermostat is installed at the right height on the wall—typically around five feet from the floor. This standard placement helps avoid temperature discrepancies often caused by heat rising or cooler air near the floor. By maintaining this simple placement guideline, you enhance your heater’s ability to operate efficiently, helping you stay warm and cozy when the outside temperature drops:
| Placement Factor | Impact | Recommended Action |
|---|---|---|
| Wall Type | Accurate Temp Reading | Avoid exterior walls |
| Drafts/Sunlight | Incorrect Heating | Position away from windows |
| Installation Height | Temperature Consistency | Install at 5 feet height |
Now that you’ve checked the thermostat, it’s time to look deeper. The power and electrical systems hold the key to your heater’s performance, and knowing how to verify them is crucial.
Verify Power and Electrical Systems

Start with inspecting your circuit breakers and fuses to determine if any have tripped or blown, which could prevent your heater from starting. Next, assess your indoor power switches, as a simple error here can stop your unit from functioning. Lastly, check for any tripped safety switches that may halt operation, often indicating deeper issues related to soot or airflow restrictions. Each of these steps is crucial for a complete inspection of your heater’s electrical systems.
Inspect Circuit Breakers and Fuses
When your heater isn’t starting, a solid first step is to inspect the circuit breakers and fuses. These components are crucial for ensuring your gas furnace receives the power it needs. If a breaker has tripped or a fuse has blown, it could directly halt your central heating system’s operation, leaving you in the cold.
Take a moment to check your electrical panel for any tripped breakers. If you spot one, simply flip it back to the “on” position. This straightforward action can often resolve power issues with your furnace and restore the heating. Just remember, if you find that breakers keep tripping, you might need to delve deeper into potential wiring hazards or seek professional furnace repair to avoid any serious risks.
Don’t forget to look at any other power connections tied to your heating system. An overlooked switch or a loose wire can affect the functionality of your heater and the overall ventilation system in your home. By addressing these small but significant details, you can identify issues quickly and get your central heating back on track, ensuring a cozy environment when temperatures drop.
Assess Indoor Power Switches
When troubleshooting your heater, don’t overlook indoor power switches. Sometimes, the issue is as simple as a switch that’s been accidentally turned off. It’s an easy fix that can save you from the hassle of calling for emergency service when you just need to flip a switch back on to get the system running again.
Another thing to check is the condition of any older switches. Over time, wear and tear can cause them to malfunction, leading to potential issues with your HVAC system. If you notice any signs of damage or fraying wires, it might be worth inspecting the warranty to see if you can get those components replaced at no cost.
Lastly, make sure the switches are in the right position for your heater type. If your heater has a pilot light, it might require specific settings on the switch to operate correctly. Understanding how your heater works, including its electrical components, helps ensure you’re taking the right steps to troubleshoot effectively and keep your home warm.
Check for Tripped Safety Switches
One common reason your heater won’t start could be related to tripped safety switches. These switches are designed to prevent unsafe operation by shutting down the system if something seems off. If your heater isn’t firing up, checking these switches should be one of your first steps in troubleshooting.
To locate safety switches, look for small buttons or toggles on the unit itself or around the power supply. If you find one that’s been tripped, simply resetting it might get your heater back in working order. Also, examine the surrounding wires for any signs of corrosion or wear; faulty wiring could also contribute to the problem.
When checking safety switches, don’t forget to inspect any valves connected to the heater. Blocked or malfunctioning valves can also cause your system to trip the safety switch, preventing the heater from starting. Ensure everything is in good shape to keep your heater functioning properly, and if you have an air purifier connected, verify that it’s not affecting the overall system performance.
- Check for tripped safety switches
- Inspect wires for corrosion
- Examine any valves connected to the heater
- Ensure air purifiers are not affecting performance
Power flows through wires, but the heart of your heating system lies in its fuel connections. Next, we’ll check these crucial links to ensure everything runs smoothly and efficiently.
Examine Fuel Connections and Supply

Examine Fuel Connections and Supply
To get your heater back on track, it’s essential to check the fuel supply. Start by ensuring there’s sufficient gas available for the system to function properly. For oil heaters, inspect the oil levels to confirm they’re adequate. If you use propane, don’t forget to check your tank levels. These simple steps can help you pinpoint any fuel-related issues your heater might be facing.
Ensure Sufficient Gas Supply
When dealing with a heater that refuses to start, one of the first things you should do is check the gas supply. Ensure your gas line valve is turned on and that there are no obstructions preventing gas from flowing. If you rely on a propane tank, make sure it’s not running low; even a small amount of gas left can impact your heater’s performance.
If everything seems fine but the heater still doesn’t ignite, you might want to take a look at the pressure in the gas line. Sometimes, low gas pressure can cause issues, meaning your heater won’t get the fuel it needs to start. You may want to consult a professional to check the gas pressure and ensure your system is functioning correctly.
Lastly, don’t forget to inspect the connections for any leaks as they can pose risks and compromise the heater’s efficiency. If you smell gas at any point, prioritize safety and turn off the gas supply immediately, then contact a technician. Keeping an eye on these aspects not only helps your heater to start but also creates a safer environment in your home.
Inspect Oil Levels for Oil Heaters
If you have an oil heater, it’s crucial to start by checking your oil levels, as low levels can lead to your system not starting. Look at your oil tank to see if you have enough fuel to keep the heater running. Sometimes, a simple glance can save you from unnecessary troubleshooting if all it takes is a refill to get things working again.
Make sure to look for any indicators on your oil tank that show how much fuel is left. If you’re not sure how to read the gauge, consulting your unit’s manual can help. Ignoring fuel levels can lead to the heater running dry, which might cause further damage or functionality issues, so it’s best to stay aware of your supply.
If your oil levels are adequate, check for any leaks around the oil lines or connections. A leak might not only prevent your heater from operating effectively but could also pose safety risks. Ensuring all connections are secure and free of leaks will help maintain your oil supply and keep your heater functioning properly, providing the warmth your home needs.
Check Propane Tank Levels
When your heater isn’t starting, checking your propane tank levels is a smart move. If you’re relying on propane to heat your home, it’s easy to overlook how quickly the fuel can deplete. Make a habit of regularly inspecting your tank, especially during colder months when your heater works harder.
If you find that your propane levels are low or empty, a simple refill can return your heating system to full functionality. A quick visual check can often tell you if you need to schedule a delivery. Keeping track of your usage allows you to avoid running out unexpectedly, which could leave you without heat.
Another important aspect to remember is to check the connections leading to your heater. Leaks in the propane line can not only prevent your heater from igniting but can also pose safety risks. If you detect any strange smells, turn off the gas supply immediately and contact a technician to ensure your heating system is safe and ready to operate smoothly.
With the fuel connections secure, the next step is crucial. Clean air filters can make all the difference in how well your system works, keeping everything running smoothly.
Inspect and Clean Air Filters

Recognizing signs of clogging in your air filters is the first step to getting your heater back on track. Whether you choose to replace or clean your filters, doing so efficiently can make a world of difference. Regular maintenance tips will also help keep your heating system running smoothly, ensuring the comfort you expect during chilly days.
Recognize Signs of Clogging
One of the first signs of clogged air filters is reduced airflow coming from your heater. If you notice that the air isn’t as warm as it should be or seems weak when it comes out of the vents, it might be a good time to check your filters. Poor airflow can lead to your heater working harder than necessary, which can cause it to wear out faster, not to mention leaving you feeling chilly.
Another indicator of clogging is an increase in dust and debris around your home. If you find yourself dusting more often or noticing particles floating in the air, your filters could be struggling to trap these contaminants. When filters are clogged, they allow more dust to circulate, which can impact your indoor air quality and create discomfort while using your heating system.
Finally, strange noises can signal that your heater is having trouble due to clogged filters. If you hear odd banging, whistling, or other unfamiliar sounds when your heater is running, it could be a sign that air isn’t flowing properly. Addressing this issue by inspecting and cleaning or replacing your filters can help improve performance and get your heating system back on track.
Replace or Clean Filters Efficiently
To maintain your heater’s efficiency, it’s important to replace or clean your filters regularly. Clogged filters can block airflow and force your heating system to work harder, which ultimately leads to increased energy costs and reduced performance. When you check your filters, aim to do this at least once a month during peak heating season; if they’re visibly dirty or covered in dust, it’s time to clean or replace them.
If you decide to clean your filters, make sure to gently vacuum or rinse them according to the type of filter you have. For disposable filters, replacing them with a new one is often a faster and more effective solution. When you opt for a new filter, choose one that fits well and suits your heating system to ensure optimal airflow and efficiency.
Keeping track of your filter maintenance not only helps improve your heater’s functionality but also enhances the air quality in your home. Clean, unobstructed filters can reduce allergens and dust circulating in your living space, creating a healthier environment for everyone. By making a habit of checking and replacing or cleaning your filters, you’re taking a proactive step toward keeping your heating system in top shape.
Regular Maintenance Tips
Keeping your air filters clean is a straightforward way to maintain your heater’s efficiency. You should check your filters monthly, especially during the heating season, to see if they’re clogged with dust and debris. A quick visual inspection can save you the hassle of dealing with reduced airflow and the frustration of a heater that won’t start.
If your filters are looking dirty, you can either clean or replace them, depending on the type you have. For washable filters, gently rinsing them under water or vacuuming them can restore proper airflow. If you’re using disposable filters, swapping them out for new ones is usually the quickest solution, ensuring optimal performance for your heating system.
Incorporating regular air filter maintenance into your routine can greatly improve the air quality in your home as well. Clean filters trap allergens and dust, helping you breathe easier during those chilly days. By taking care of your filters, you not only keep your heater running smoothly but also contribute to a healthier environment for yourself and your family.
Cleaning air filters is just the start. As you dig deeper, unexpected issues may surface, and knowing how to troubleshoot them can make all the difference.
Additional Considerations for Troubleshooting

When troubleshooting your heater, pay attention to any strange noises or smells, as these can indicate issues that need urgent attention. You should also check for error codes on your thermostat display, which can provide clues to the problem. Lastly, knowing when to call in a professional can save you time and ensure your heating system gets the expertise it needs.
Look for Strange Noises or Smells
If you notice any strange noises coming from your heater, it’s a sign that something might not be right. Sounds like banging, clattering, or whistling can indicate loose components or airflow issues. Pay attention to when these noises occur; if they happen during startup, it could suggest mechanical problems or blockages in the ducts.
Unusual smells can also alert you to potential hazards. A burning smell might mean dust is accumulating in your heater, which is common at the start of the season. However, if you encounter a gas odor, it’s crucial to act immediately by turning off your gas supply and contacting a professional, as this could pose serious safety risks.
Being attentive to these warning signs can help you identify issues early on. If you hear persistent noises or catch a foul smell, take a moment to inspect your system. Keeping a close eye on these details and addressing them quickly can save you from larger repairs down the line and ensure a warm, safe space for you and your family:
| Warning Signs | Potential Issues | Recommended Action |
|---|---|---|
| Strange Noises | Loose components, airflow restrictions | Inspect for blockages, secure parts |
| Unusual Smells | Dust buildup, gas leak | Clean the unit, turn off gas, call a pro |
| Persistent Problems | Mechanical failures | Schedule an HVAC service for evaluation |
Identify Any Error Codes on Display
When your heater won’t start, checking the display for any error codes can provide crucial insight into the problem. Many modern heating systems come equipped with digital displays that show specific codes when there’s an issue. If you spot an error code, refer to your user manual, as it often contains valuable information about what that code means and how to address it.
For example, a common error code might indicate a problem with the ignition or a fuel supply issue. If you see a code that you don’t recognize, a quick search online based on your heater’s model could provide further clarification. Understanding these codes can simplify troubleshooting and help you determine whether you can handle the fix or if it’s time to call in a professional.
Taking note of those error codes and their meanings can also help you communicate better with HVAC technicians, should you decide to seek help. Providing them with information about what you’ve observed can speed up the diagnostic process, saving you both time and money. Remember, addressing error codes promptly can lead to a quicker resolution and a more efficient heating system for your home:
| Error Code | Possible Issue | Recommended Action |
|---|---|---|
| Ignition Failure | Problem with ignition components | Inspect ignition system, or call a pro |
| Low Fuel Supply | Insufficient gas or oil | Check fuel levels and lines |
| Overheating | Blocked vents or airflow issues | Inspect filters and ductwork |
Know When to Seek Professional Help
Knowing when to call in a professional can save you a lot of time and frustration. If you’ve gone through the basic troubleshooting steps—like checking the thermostat, power supply, and fuel levels—and your heater still won’t start, don’t hesitate to reach out for expert help. A service technician has the training and tools necessary to diagnose complex issues that may be beyond typical troubleshooting.
Additionally, if you notice any strange noises, unfamiliar smells, or recurring problems, it’s a clear sign that something isn’t right with your heating system. While some minor issues can be managed at home, persistent symptoms often indicate a deeper issue requiring professional assessment. For example, a gas odor or unusual sounds might point to serious safety risks that need immediate attention.
Lastly, don’t overlook your comfort and safety. When winter temperatures drop, having a reliable heating system is essential. Seeking professional help not only ensures that your heater is fixed correctly but also provides peace of mind knowing that your home will remain warm and secure throughout the colder months. Plus, these experts can offer tips for maintaining your unit, helping you avoid similar issues down the line.