

Table Of Contents:
Is your heater not starting when you need it the most? You’re not alone; many homeowners face this frustrating issue. In this guide, you’ll learn how to troubleshoot common problems, like checking the power supply, inspecting thermostat settings, and assessing your fuel supply for electric heating or natural gas units. By following these steps, you can identify the root cause of your heater’s failure and restore warmth to your home. Engaging with this content will equip you with practical solutions, ensuring your heater gets back to work when the temperature drops.
Key Takeaways
- Recognizing heater issues early can save time, money, and frustration
- Check your thermostat settings before troubleshooting your heating system
- Regular maintenance and inspections help prevent major heating failures
- Gas leaks are serious; contact a professional immediately if detected
- Service agreements can offer priority scheduling and discounts for repairs
Understanding Common Issues When Your Heater Won't Start

When your heater won’t start, spotting the signs early is key. This section will help you identify those indicators and understand why timely troubleshooting matters. We’ll look at common issues, from voltage problems to energy supply cuts, and explain when to call newrisehvac, an HVAC professional for safety. Let’s get your heater back on track!
Identify the Signs of a Heater That Won't Start
Recognizing the signs that your heater won’t start can save you time and frustration. If you hear unusual noises, like rattling or hissing, or if the system is completely silent, these could indicate a problem. In gas heaters, a flickering pilot light or a blinking warning light may suggest an issue with the gas supply or the igniter, demanding your attention.
If you notice a lack of heat even when the system is on, check if your thermostat is set correctly. Sometimes, debris or dust buildup around the compressor or boiler can prevent the unit from functioning effectively. It’s also a good idea to inspect any visible components for signs of wear or disconnects, which can often lead to heating failures.
Other red flags include irregular air flow and frequent cycling on and off. If your heater seems to be working harder than it should, this might point to a larger underlying issue, such as problems in the tank or air ducts. Make a checklist of these signs and act quickly to avoid more extensive repairs:
- Unusual noises from your heater
- Inconsistent heat output
- Issues with the thermostat settings
- Debris near the compressor or boiler
- Frequent on/off cycling of the unit
Recognize the Importance of Timely Troubleshooting
Timely troubleshooting of your heater can save you time, money, and frustration. When you notice strange noises or irregular airflow, those signs shouldn’t be ignored. Addressing these indicators early can prevent minor issues from escalating into costly repairs or even complete system failures.
Understanding how your heating system works, including components like the combustion chamber and ducts, can help you identify problems faster. For instance, if the airflow seems restricted, it could signal a blockage in your duct system that needs immediate attention. Left unattended, these issues could lead to inefficient heating, increased energy bills, and unsafe operating conditions.
Using professional heating services for regular maintenance can also help catch issues before they become serious. By making a habit of scheduling inspections, you can keep your system running smoothly and efficiently, leading to a more comfortable home environment. Paying attention to these details can ultimately prevent those inconvenient heater breakdowns when you need warmth the most:
| Signs of Issues | Possible Causes | Recommended Action |
|---|---|---|
| Unusual noises | Loose components, airflow obstructions | Inspect and secure parts |
| Poor airflow | Blocked ducts, dirty filters | Clean/change filters; check ducts |
| Inconsistent heating | Faulty thermostat, combustion issues | Calibrate thermostat; call for service |
| Frequent cycling | System stress or malfunction | Schedule a professional review |
Sometimes, the answer lies in a simple setting. Let’s check the thermostat and see if it’s set just right.
Verify the Thermostat Settings

Verify the Thermostat Settings
Make sure your thermostat is set to heat and that it reflects the desired room temperature. Calibration issues can cause discrepancies between the actual temperature and what the thermostat indicates, impacting your system’s efficiency. Also, check for any relay or pump concerns, especially if you have baseboard heating. Understanding these elements will help clarify why your heater might not be starting as expected.
Ensure the Thermostat Is Set to Heat
When troubleshooting your heater, the first thing you should do is check your thermostat settings. Make sure it’s set to heat mode and the temperature is set higher than the current room temperature. This simple step can resolve many heating issues, as sometimes all it takes is a minor adjustment to get your system running again.
If your heater still doesn’t respond, inspect the relay and electrical wiring connected to the thermostat. Malfunctions in these elements can disrupt the signal sent to your furnace, preventing it from firing up. Taking a closer look here is crucial since it could affect overall furnace troubleshooting efforts if left unchecked.
Another important factor to consider is that faulty thermostats can sometimes emit carbon monoxide if they malfunction in certain heating systems, especially gas furnaces. To ensure your safety, regularly test your carbon monoxide detectors and double-check your thermostat’s operation. Keeping an eye on these elements not only helps get your heat back on but also protects you and your family from potential hazards.
Check for Calibration Issues
Calibration issues can sneak up on you, affecting your furnace‘s efficiency and your home’s comfort. If your thermostat isn’t calibrated correctly, it might not communicate with your heating system properly. This miscommunication can lead the system to either run too frequently or not engage at all, leaving you without heat when you need it most.
To check for calibration problems, start by taking a close look at the displayed temperature compared to a reliable thermometer in the same room. If there’s a noticeable difference, your thermostat‘s sensors might be out of whack. Addressing this can often be a simple fix, but if the calibration continues to be off, you might want to consider having an electrician evaluate your system for potential underlying issues.
Another key element is the heat exchanger and combustion components. If these parts are not functioning correctly, they can impact how the heat gets distributed throughout your space. Regular checks and maintenance on all heating components, including the thermostat, can help ensure everything works smoothly, keeping your home warm without unexpected interruptions:
- Check your thermostat against a reliable thermometer.
- Adjust settings if there’s a significant temperature difference.
- Consider professional help from an electrician when issues persist.
- Inspect the heat exchanger and combustion for efficient operation.
The thermostat settings are right, but something still feels off. Next, look at the power supply and check the circuit breaker; it might be the key to bringing back the comfort.
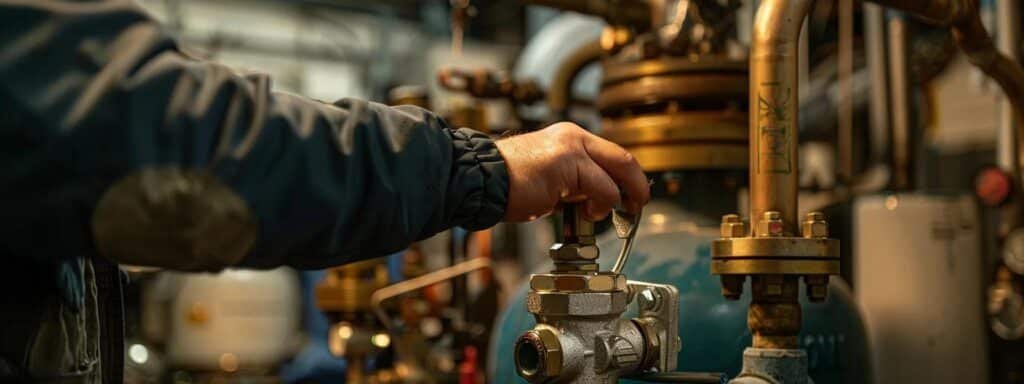
Inspect Power Supply and Circuit Breaker

First, confirm your heater is plugged in properly. Sometimes, electrical issues arise from loose connections. Next, examine the circuit breaker for any trips that might prevent your heating system from working. A tripped breaker can lead to more significant problems, such as leaks or humidity issues. Let’s break these steps down to get your heat pump fired up!
Confirm the Heater Is Plugged In
First things first, start by checking whether your heater is properly plugged in. It’s easy to overlook, but loose connections can often cause your unit to stop working. If you find your heater is connected through an extension cord, consider switching to a direct wall outlet, as some models don’t handle extension cords well.
Next, make sure there are no issues with the circuit breaker. A tripped circuit breaker can interrupt the power supply to your heater, leaving you in the cold. Look for any switches that may have flipped to the off position and reset them if necessary. Be cautious if you notice repeated trips, as this could indicate a more serious electrical issue.
Lastly, while you’re inspecting the power supply, keep an eye out for any signs of a gas leak if you have a gas-powered heater. If you notice a smell of gas or any unusual sounds, it’s vital to address this immediately. Addressing these power supply checks will help ensure your air handler is receiving the necessary intake to operate effectively:
- Check the heater’s plug connection.
- Avoid using extension cords when possible.
- Inspect the circuit breaker for tripped switches.
- Be alert for any signs of a gas leak.
Examine the Circuit Breaker for Trips
Checking the circuit breaker is a crucial step when your heater won’t start. A tripped breaker can prevent your heating system from receiving power, leaving you without warmth. Look for any switches that are in the “off” position; restoring them to “on” might be all it takes to get your heater up and running again.
If you find that the breaker trips repeatedly, this could indicate a more serious issue within your heating system. Electrical problems, including faults within the ignition system or a malfunctioning sensor, may be at play. In this case, reaching out to a professional can help diagnose underlying issues related to dust buildup in components like the chimney or condenser.
While you inspect the circuit breaker, keep an eye out for any signs of overheating or unusual smells. These could indicate electrical problems that might pose safety risks. Addressing these concerns early not only protects your heating system but also ensures your home stays safe and comfortable:
| Issue | Signs | Recommended Action |
|---|---|---|
| Tripped Circuit Breaker | Breaker in “off” position | Reset the breaker |
| Repeating Trips | Frequent trips after reset | Contact a professional |
| Overheating | Burning smell or discoloration | Inspect and address immediately |
The power supply checked out fine; all systems were a go. Now, it was time to see if the fuel was ready to keep things running.
Assess the Fuel Supply
Start by ensuring the gas valve is open; a closed valve can prevent your heater from getting the fuel it needs. Next, check for sufficient propane or fuel levels to ensure your heating element has enough to work effectively. These steps will help you pinpoint issues before they escalate, setting the stage for a smoother troubleshooting process.
Make Sure the Gas Valve Is Open
Before troubleshooting your heating unit, the first step is to make sure the gas valve is open. If the valve is closed, your heater won’t get the fuel it needs to operate. Taking a moment to check this can save you time and help avoid further issues that could arise from lack of fuel flow.
When checking the gas valve, look for the handle that connects to the gas line. It should be aligned with the pipe for it to be in the open position. If you find it turned perpendicular to the pipe, simply turn it parallel to ensure that gas flows properly to your heater, preventing any disruptions that might compromise your indoor air quality.
It’s also worth noting that if your heating unit has a thermocouple, a closed gas valve can lead to false readings that cause the unit to shut down unexpectedly. Ensuring the gas valve is open not only helps your heater kick back into gear but also reduces the risk of malfunctions down the line. Regularly checking this simple yet crucial aspect can go a long way in keeping your home warm and comfortable.
Check for Sufficient Fuel Levels
Checking the fuel levels for your heater is a critical step that shouldn’t be overlooked. If you rely on gas, ensure that the gas valve is fully open and that there’s enough gas supply. For homes with propane, inspect the tank visually to confirm levels; running out of fuel can lead to starting issues, leaving you cold.
In cases where you have a pilot light, make sure it’s lit. A blown fuse can also affect the operation of your heating system, including the ignition components. If you notice any soot buildup around the pilot light or burner area, it could indicate a problem that might need professional attention.
Your air filter also plays a role in your heating system‘s efficiency. A dirty filter can reduce airflow, leading to overheating and shutdowns. Regular inspection and replacement of the air filter not only helps maintain fuel efficiency but also prevents potential issues down the line:
| Fuel Supply Inspection | Signs to Check | Recommended Action |
|---|---|---|
| Gas Valve | Closed or partially open | Open the valve fully |
| Propane Levels | Low or empty tank | Refill or exchange the tank |
| Pilot Light | Extinguished | Relight according to the manufacturer’s instructions |
| Soot Buildup | Visible residue or clogs | Schedule a professional cleaning |
| Air Filter | Dirty or clogged | Change the filter regularly |
With the fuel supply assessed, attention shifts to the air. Clean filters and clear vents ensure the system breathes freely, making every breath of fresh air count.
Examine Air Filters and Vents
When troubleshooting your heater, it’s crucial to examine your air filters and vents. Clean or replace clogged air filters to maintain efficient airflow in your gas furnace or central heating system. Additionally, removing any obstructions from vents ensures proper ventilation, helping to prevent indoor hazards. Let’s dive into the steps for dealing with these common issues!
Clean or Replace Clogged Air Filters
Cleaning or replacing clogged air filters is an essential step in maintaining your heating system’s efficiency. Over time, wear and tear on filters can lead to reduced airflow, making your heater work harder. This places additional strain on HVAC components, potentially causing system failures or requiring emergency service when you least expect it.
If you notice inconsistent heating or a drop in air quality, it’s likely time to address your air filters. A dirty filter can not only block airflow but can also impact the performance of other crucial components, like the pilot light in gas systems. Regular checks and timely replacements help ensure your heater runs smoothly, keeping you warm and comfortable during cold months.
To avoid costly repairs and maintain your warranty, establish a schedule for filter maintenance. Depending on the type of filter you use, cleaning or replacing it every one to three months can greatly enhance your heater’s reliability. Remember, addressing minor issues before they escalate will save you time, money, and unnecessary stress in the long run:
| Maintenance Task | Frequency | Benefits |
|---|---|---|
| Clean air filters | Every 1-3 months | Improved airflow and efficiency |
| Replace air filters | As needed | Prevents breakdowns and extends lifespan |
| Inspect pilot light | Seasonally | Ensures proper functioning of gas heaters |
| Schedule professional checkup | Annually | Identifies hidden issues early on |
Remove Obstructions From Vents
When your heater isn’t working, one of the first things to check is the vents. Over time, dust, furniture, and even pet hair can block airflow, preventing hot air from circulating through your home. Regularly inspecting and cleaning these areas ensures that your heater operates efficiently, keeping you comfortable during colder months.
Another aspect to consider is the condition of the ventilation system itself. Look for any signs of corrosion or wear around the valve or wire connections. Corrosion can disrupt airflow and lead to further issues down the line. Maintaining these components can help you avoid costly repairs and improve the overall performance of your heating system.
Don’t forget about the benefits of an air purifier in your space. While it won’t directly resolve issues with your heater, it can enhance your indoor air quality by reducing contamination and dust that might otherwise accumulate in your vents. A cleaner environment means your heating system doesn’t have to work as hard, keeping your home warm more efficiently:
| Task | Importance | Recommended Frequency |
|---|---|---|
| Check for Blocked Vents | Ensures optimal airflow | Monthly |
| Inspect for Corrosion | Prevents efficiency loss | Seasonally |
| Use an Air Purifier | Improves air quality | As needed |
If your filters and vents are clean, the next step is to dig a little deeper. Let’s turn our attention to the internal components that keep your system running smooth.
Troubleshoot Internal Components

Start by inspecting the blower motor for issues, as it plays a crucial role in moving warm air throughout your home. Next, evaluate the safety switches and reset features to ensure everything is functioning correctly. Finally, look into ignition or pilot light problems, which can prevent your heater from starting. Each of these aspects is vital for effective troubleshooting.
Inspect the Blower Motor for Issues
When your heater won’t start, one of the first things to check is the blower motor. This component is essential because it circulates warm air throughout your home. If the blower motor isn’t functioning, even a good heating system can’t keep your space warm.
You can visually inspect the blower motor for any signs of damage or debris buildup. Make sure there aren’t any obstructions blocking the air intake. If the motor appears dirty, cleaning it can help restore its efficiency, allowing it to work its best during those chilly nights.
If you notice that the blower motor is making unusual noises or is completely silent, it might be time for a deeper investigation. Issues like a blown fuse, a malfunctioning capacitor, or electrical problems can prevent the blower from running. Don’t hesitate to consult a professional to ensure everything is checked thoroughly, as this will help keep your heater running smoothly and efficiently.
Evaluate Safety Switches and Reset Features
When your heater won’t turn on, evaluating safety switches is a crucial step. Safety switches are designed to shut down the system if there’s a potential issue, like overheating or a blocked vent. Check for any visible safety switches around your unit and ensure they haven’t been tripped. If they have, resetting them might just be what you need to get your heater running again.
In addition to the safety switches, your heater may have a reset button that requires your attention. This button often sits on or near the furnace and can be pressed if the system has shut down due to a fault. Pressing the reset button could allow your heater to restart, but keep an eye on it to see if it shuts down again. If it does, it may indicate an underlying problem that needs to be addressed by a professional.
Regularly checking the condition and functionality of safety switches and reset features can help prevent unexpected breakdowns. Staying proactive allows you to stay warm without putting yourself at risk for larger issues down the line. Don’t overlook these components; they play a vital role in ensuring your heating system operates safely and effectively:
| Component | Signs of Trouble | Recommended Action |
|---|---|---|
| Safety Switches | Tripped or damaged | Inspect and reset if needed |
| Reset Button | System not restarting | Press reset; seek professional help if it shuts down again |
| Overall System Functionality | Frequent shutdowns or irregular operation | Schedule a professional evaluation |
Look Into Ignition or Pilot Light Problems
If your heater isn’t starting, one of the first things you should check is the ignition or pilot light. For gas furnaces, a pilot light that’s out can prevent the system from functioning. Take a moment to see if the pilot light is lit; if not, relighting it according to the manufacturer’s instructions is often a quick fix that can get the heat flowing again.
If your heater still won’t start after relighting the pilot, examine the ignition system. Problems might be occurring in the ignition sensor or the gas valve, which could be blocking gas flow. Checking for these issues and addressing them promptly can save you from bigger repair costs later on.
Also, keep an eye on the condition of your pilot light. If you notice any yellow or flickering flames, this could indicate a problem with the gas supply or ventilation. Addressing these concerns not only improves the efficiency of your heater but also ensures that your home remains safe and warm. Regular checks on the ignition system can help you avoid inconvenient breakdowns in the future.
You’ve looked over the internal parts, but there are times when things just won’t budge. Knowing when to bring in a pro can make all the difference in getting your system back on track.
Know When to Call for Professional Help
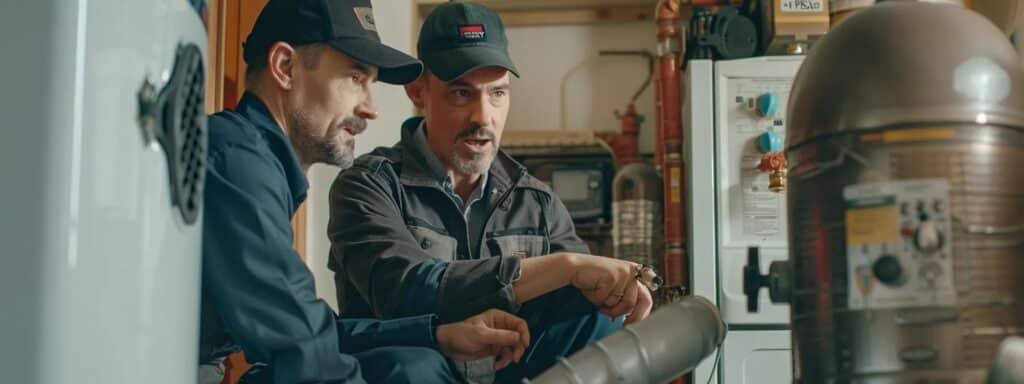
Sometimes, troubleshooting your heater reveals severe problems that need expert help. Learn how to identify these issues and when to call a professional. Also, understanding service maintenance agreements can keep your system running smoothly and efficiently. Let’s get into how you can protect your investment and ensure your home remains comfortable.
Identify Severe Problems That Require Expert Attention
When your heater won’t start and you’ve gone through the basic troubleshooting tips, it’s time to consider whether you’re facing a severe issue. If you hear loud banging or clanking noises, this could signal a significant problem like a malfunctioning blower motor or an internal obstruction. Ignoring these sounds can lead to more extensive damage and costly repairs, so don’t hesitate to get a pro involved.
Another sign that it’s time to call for expert help is if your heater shows frequent cycling or doesn’t maintain a consistent temperature. These issues can point to underlying problems with your thermostat, ductwork, or even the heater itself. A professional can help diagnose the root cause and provide the right solutions to ensure your home stays warm.
Lastly, if you smell gas or notice any unusual odors coming from your heater, you should shut it down immediately and contact a professional. Gas leaks are serious and demand prompt attention for your safety. Relying on an HVAC expert will not only help you identify the issue but also ensure your heating system operates safely and effectively moving forward.
Understanding Service Maintenance Agreements
Understanding service maintenance agreements can be a game-changer when it comes to keeping your heater running smoothly. These contracts often cover regular inspections and tune-ups, allowing you to catch potential issues before they become big problems. By having a plan in place, you can ensure that your heating system is always ready to perform when you need it most.
In many cases, service maintenance agreements include perks like priority scheduling and discounts on repairs. This can save you both time and money during emergency situations when your heater won’t start. Plus, knowing that a professional is just a call away can give you peace of mind during the colder months.
Before signing any agreement, it’s wise to read the terms carefully. Make sure you understand what’s included, such as the frequency of service visits and what types of repairs are covered. This knowledge will help you make informed decisions about your heating system‘s maintenance and will keep your home comfortable year-round:
- Regular inspections help catch problems early.
- Priority service can save you time in emergencies.
- Discounts on repairs reduce unexpected expenses.
- Understanding terms ensures you know what to expect.