

Table Of Contents:
- Key Takeaways
- What to Check if Your Heater Does Not Turn On
- Identifying Common Problems With Non-Functioning Heaters
- When to Seek Professional Help for Heater Issues
- Preventive Measures to Avoid Future Heater Issues
- Preventive Measures to Avoid Future Heater Issues
- Understanding Different Types of Heating Systems
- Helpful Resources and Guides for Heater Troubleshooting
Is your heater refusing to turn on during those chilly nights? You’re not alone. Many homeowners face this frustrating issue, but troubleshooting doesn’t have to be daunting. In this post, we’ll cover essential steps to check your heater, common problems that might be causing it to fail, and when to call in the experts from NewRise Heating and Cooling. By following these tips, you can quickly diagnose heater issues and potentially avoid costly repairs, ensuring your home stays warm and cozy when you need it most. Let’s get started on solving your heating troubles!
Key Takeaways
- Regular maintenance helps prevent heater malfunctions and keeps your home comfortable during winter
- Always check your thermostat settings and batteries before assuming there’s a bigger issue
- Clogged air filters can restrict airflow and lead to inefficient heating
- Inspecting the circuit breaker and emergency switch can resolve heating problems quickly
- Understanding your heating system type aids in effective troubleshooting and efficient operation
What to Check if Your Heater Does Not Turn On
If your heater refuses to turn on, there are a few quick checks you can do. Start by replacing the batteries in your thermostat to ensure proper power supply. Next, review the settings on the thermostat to confirm it’s set correctly. After that, inspect your circuit breaker and check the emergency switch. Don’t forget to change the heater’s air filter and cycle the power on your heating unit. These simple actions could get your heater working smoothly again with newrisehvac.
Replace the Batteries in Your Thermostat
If your heater isn’t kicking on, one of the first things to check is the thermostat‘s batteries. Even with modern electric heating systems, such as those used for your bathroom or living room, a simple battery replacement can solve many issues. Make sure you’re using the right type of batteries for your thermostat; this ensures it gets the power it needs to function properly.
After replacing the batteries, it’s important to confirm that the thermostat settings are correct. If you’re using a space heater in addition to your central heating or natural gas system, ensure the thermostat is set to “heat” instead of “cool.” A quick check of the settings can save you from unnecessary panic when it’s simply a matter of flipping a switch.
Remember that a heater won’t turn on if the thermostat can’t communicate its settings due to dead batteries. After making this quick fix, your heater should respond as expected. If it still doesn’t heat up, it might be time to troubleshoot further or consider reaching out to a professional for a deeper look.
Check the Settings on the Thermostat
When your heater won’t turn on, the thermostat settings are a good place to start. Check to make sure the thermostat is set to the “heat” option rather than “cool,” as a simple switch can prevent it from starting up. If the settings aren’t aligned with your intended use, your home won’t benefit from the energy efficiency you aim for.
You should also confirm that the temperature on the thermostat is set higher than the current room temperature. This adjustment helps ensure the heating system activates properly. If the programmed temperature is set too low, it may not trigger the thermal expansion required for your heater to function, leaving you in the cold.
Lastly, monitor the voltage supplied to your thermostat and heating unit. A lack of sufficient volt power can halt your heater’s operation, making it essential to check wiring and connections. By confirming the settings and power supply, you are taking essential steps in your home improvement efforts to maintain a comfortable environment all year round.
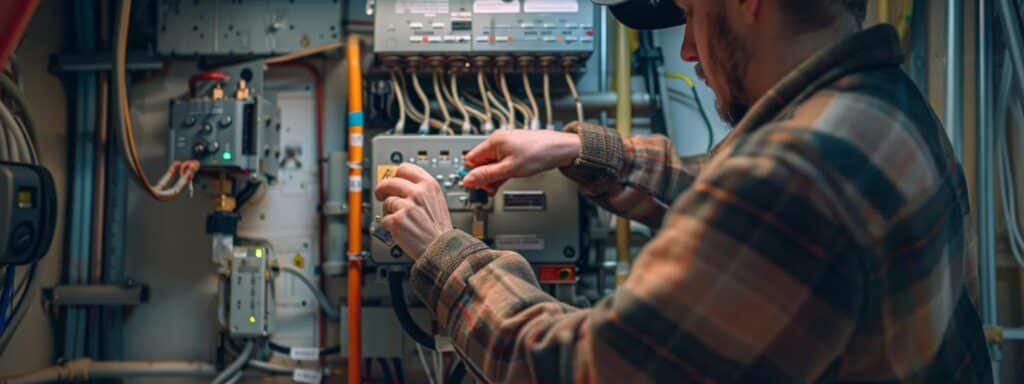
Inspect the Circuit Breaker and Emergency Switch
When your heater fails to ignite, one of the first things to inspect is your circuit breaker. Often, power surges can trip the breaker, cutting off the electricity to your heating system. If you find that the breaker for your boiler or fireplace has flipped, a simple reset may be all you need to get your heater back online.
Alongside the circuit breaker, don’t overlook the emergency switch. This switch is designed to shut down your heating system in case of an emergency. If it’s been accidentally flipped, it can prevent your heater from working, so ensure it’s in the correct position. Checking both components can save you time and hassle, keeping your home warm and cozy.
Lastly, consider how these elements interact with your heater’s control valve or tank system. If your boiler requires a specific power level to operate effectively, ensuring the circuit and emergency switch are in working order is key. By taking these straightforward steps, you can troubleshoot effectively and avoid unnecessary professional visits, maximizing your home comfort throughout the colder months.
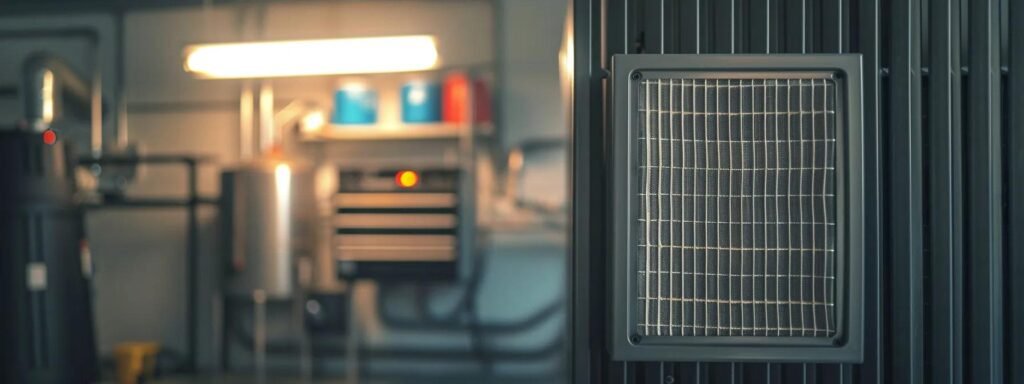
Change the Heater's Air Filter
One common issue that can prevent your heater from working is a clogged air filter. If your filter is packed with debris, it can restrict airflow, causing your heating system to struggle or even shut down entirely. Regularly checking and changing the air filter is an easy but vital maintenance step that helps keep your renovation projects and home comfy during colder months.
When working out of your basement or any other area where dust and pests might accumulate, it’s especially important to keep your heater’s air filter clean. Not only does a clean filter promote good airflow, but it also prevents allergens and debris from circulating through your home. A simple check of your filter every month or so can add years to your heating system’s life and ensure it runs efficiently.
Setting a reminder on your programmable thermostat can help you stay on top of this task. By knowing when to check and replace your air filter, you create a consistent routine that contributes to the overall health of your heating system. Taking these straightforward steps can save you from unexpected breakdowns and keep your home cozy when you need it most:
- Check your air filter for dirt and debris.
- Replace the filter if it appears congested.
- Make a habit of monitoring your air filter monthly.
- Use your programmable thermostat to set reminders for changes.
Cycle the Power on Your Heating Unit
If your heater isn’t turning on, cycling the power on your HVAC system can be a quick and effective fix. To do this, you simply need to turn off the power supply to the unit from the breaker box. Wait for about five minutes before turning it back on. This brief reset can help clear any faults and allow the system to restart, providing the necessary airflow through the ducts.
Sometimes, issues occur with the relay that controls power to your heating unit, and a power cycle can help reset these components. When you cycle the power, it gives all parts of the system, including the thermostat and the relay, a chance to recalibrate. This may resolve minor glitches and get your heating system functioning more smoothly again.
Don’t forget that maintaining your HVAC system regularly, including ensuring power cycling is part of your routine, can prevent unexpected breakdowns. If you notice ongoing problems after cycling power, it could indicate a deeper issue needing professional attention. You’ll want to keep your home comfortable, so staying proactive can truly pay off during the colder months.
Sometimes, your heater just won’t start. Let’s look at what might be wrong and how to spot common issues with non-functioning heaters.
Identifying Common Problems With Non-Functioning Heaters
When your heater doesn’t turn on, there are a few common issues to check. You might find no response from the thermostat, while a blown fuse or tripped circuit breaker could also be at play. Blocked air vents or ducts need attention, and in gas models, a dirty igniter or ineffective pilot light operation may prevent heating. Understanding these points can help you troubleshoot effectively.
No Response From the Thermostat
If your heater isn’t responding, the first thing to check is your thermostat. Make sure it’s properly connected to the power cord and that the batteries, if applicable, are fresh. A dead thermostat can stop your whole heating system from getting the signals it needs to operate, leaving you cold during winter months.
Another reason for a lack of response from the thermostat could be clogged air filters. When filters are full, they can restrict airflow, causing the system to operate inefficiently or not at all. Regularly changing your air filters helps maintain smooth airflow, ensuring your heater functions properly and efficiently.
If everything seems fine but the heater still won’t turn on, keep an eye out for potential carbon monoxide issues. While this isn’t common in every heating system, gas heaters can malfunction and produce carbon if they aren’t serviced correctly. If you suspect anything unusual, it’s best to get a professional in to troubleshoot the problem and keep your home safe.
Blown Fuse or Tripped Circuit Breaker
If your heater is not responding, you might want to check for a blown fuse or tripped circuit breaker. Sometimes, power surges can disrupt the flow of electricity to your furnace, leading to a complete shutdown. Make sure to look at the circuit breaker panel in your home, especially if you notice other electrical appliances acting up at the same time.
Blocked Air Vents or Ducts
Blocked air vents or ducts can be a sneaky cause behind your heating system not turning on. When your airways are obstructed, air can’t circulate freely, leading to inefficient heating. This blockage may come from dust buildup, furniture placement, or even animal nests, disrupting the performance of your heat pump or furnace.
If airflow is restricted, essential components like the heat exchanger may overheat and trigger safety shut-offs. In gas-powered heating systems, blocked vents can prevent proper combustion, causing your heater to malfunction. Regularly checking and cleaning your vents not only keeps your heating system functional but also ensures you’re not wasting energy when it’s time to crank up the heat.
Addressing blocked ducts is vital for maximizing efficiency and preventing leaks in the ductwork. If you notice uneven heating or cold spots, inspect your vents and ducts for clogs. Making the effort to keep these areas clear ensures that air flows smoothly and your home stays cozy all winter long:
| Common Problems | Signs to Look For | Recommended Actions |
|---|---|---|
| Blocked Air Vents | Poor air circulation, cold spots | Clear debris, relocate furniture |
| Blocked Ducts | Uneven heating | Inspect ductwork, clean regularly |
| Combustion Issues | Strange odors, noise | Ensure proper venting, call a pro |
Dirty or Faulty Igniter in Gas Models
If your gas heater won’t turn on, one common culprit could be a dirty or faulty igniter. This small component plays a crucial role in lighting the gas fuel that keeps your space warm. When the igniter is covered in dust or grime, it may fail to produce a spark, leaving your heater inactive. Regular cleaning can help maintain its functionality and ensure safe operation.
Before you dive into addressing the igniter, it’s wise to check the thermostat settings first. If everything seems good there but you’re still having trouble, inspect the igniter and any surrounding sensors for dust buildup. If you see a lot of dirt, a thorough cleaning might just do the trick. In some cases, if the igniter is still unresponsive, it may need replacement, allowing your heater to operate as it should again.
In addition to the igniter, ensure that the gas line and chimney are clear for proper combustion. A blocked chimney can cause safety issues and impact how well your heater works. By taking care of these components and keeping an eye on the circuit breaker to avoid power disruptions, you’ll be well on your way to restoring warmth to your home:
- Check thermostat settings to ensure they’re correct.
- Inspect the igniter and surrounding sensors for dust.
- Clean the igniter regularly to maintain its function.
- Ensure the gas line and chimney are clear.
- Monitor the circuit breaker for any potential issues.
Ineffective Pilot Light Operation
If your heater isn’t firing up, an ineffective pilot light could be the culprit. The pilot light is essential for igniting the heating element, so if it’s out, your heating unit won’t produce any warmth. Take a moment to visually check the pilot light; if it’s not lit, you may need to relight it according to your unit’s instructions.
Sometimes, a faulty thermocouple can also cause the pilot light to fail. This small, screw-like device detects whether the pilot light is on and controls the gas valve. If the thermocouple is dirty or damaged, it can think the pilot isn’t lit, which prevents the gas from reaching the heating element. Cleaning or replacing the thermocouple might be the solution to get your heater working again.
A malfunctioning pilot light not only affects your heater’s performance but can also impact indoor air quality. When gas isn’t igniting properly, it could lead to harmful gases accumulating. Ensuring proper pilot light operation is vital for both comfort and safety. If you’re unsure about handling these components, reaching out to a professional can help you avoid further issues and keep your home warm this winter.
It’s frustrating when your heater fails to work, leaving you in the cold. Knowing when to call a professional can save you time and trouble, so let’s look at those signs.
When to Seek Professional Help for Heater Issues

If you notice unusual noises coming from your heater, inconsistent heating across different rooms, or find yourself frequently resetting it, these could be signs that professional help is needed. Visible damage or persistent error codes on digital displays also indicate potential risks to your system. Don’t ignore these issues; addressing them early can prevent more costly repairs down the line.
Additionally, keep an eye on the pilot light and check for any issues with the air filter or fuse. Understanding these signals can help you make informed decisions about contacting a heating expert when necessary.
Unusual Noises Coming From the Heater
If you start to hear unusual noises coming from your heater, it’s a clear indicator that something might be off. Sounds like banging, hissing, or popping could signal issues with pressure in your system or air trapped in the ducts, impacting your ventilation. Ignoring these sounds might lead to bigger problems down the line, especially if you have a gas furnace that requires a specific pressure balance to operate safely.
Sometimes, you might notice a low rumbling or grinding noise that could mean your central heating system has internal parts wearing out. Such noises often point to a possible malfunction, which can become a hazard if left unchecked. Taking action is essential; reaching out to a heating professional ensures your system gets the attention it needs to avoid further damage.
Don’t brush off these sounds as just a harmless annoyance. Regular maintenance and prompt responses to unusual noises not only keep your heater efficient but also enhance your safety. If your heater is making strange noises, it’s best to consult an expert who can diagnose the issue and restore the comfort of your home without risking your heating system‘s integrity.
Inconsistent Heating Across Rooms
If you’re experiencing inconsistent heating across rooms, it might indicate a deeper issue that needs attention. Warm air struggles to circulate effectively when there are problems with your HVAC system, which could be due to clogged filters or blocked vents. Make sure the air filtration system is clean and functional to allow for proper airflow, as this can significantly affect overall heating performance.
Another factor to consider is whether your heating source, such as oil or gas, is functioning properly. If your system relies on a pilot light, confirm that it’s lit and operating as it should; a faulty pilot can lead to uneven heating throughout your space. If the fuel supply isn’t consistent or the burners aren’t igniting correctly, it can create cold spots in your home.
Neglecting these symptoms could result in higher energy bills since your heater works harder to maintain temperatures. If you’ve checked basic issues like filters and fuel supplies but still find chilly areas in your home, reaching out to a professional might be necessary. They can diagnose complex HVAC problems and ensure that your heater is running smoothly, so you can enjoy a cozy environment in every room.
Frequent Resetting of the Heater
If you find yourself frequently resetting your heater, it can be a sign that something is not right. This could be linked to issues like a malfunctioning capacitor or faulty wiring that disrupts the power supply to your unit. When the circuits can’t maintain a steady connection, you end up having to reset the heater repeatedly, which can be both frustrating and inconvenient.
Another potential cause for constant resetting could be related to the valve, which controls the flow of gas or other fuel to your heating system. If the valve is sticking or not functioning correctly, it can cut off the needed supply, leading to shutdowns. To address this issue effectively, it’s best to consult an HVAC technician who can diagnose the problem and offer a reliable fix.
Ignoring frequent reset needs can lead to larger issues down the line that might require you to check your roof or other areas connected to your heating system. It’s important to keep an eye on how often you have to reset the heater. If it becomes a habit, don’t hesitate to reach out for expert help to ensure your heating system runs efficiently:
- Watch for patterns in how often you reset.
- Consider potential faulty components like the capacitor or valve.
- Contact an HVAC technician if the issue persists.
Visible Damage or Wear on Components
When you’re inspecting your heater and notice visible damage on components, it’s definitely a sign to take action. Cracked wiring, rusted parts, or a malfunctioning limit switch can point to bigger problems. Any visible wear and tear could lead to inefficient heating or even pose safety risks, so don’t ignore these signs.
If you see damage to the casing or any exposed wires, it’s best to have a professional take a look. Ignoring issues can cause further complications and may lead to complete system failure. A heating expert can assess the condition of the humidifier and other associated components, ensuring everything operates safely and efficiently.
Keeping an eye on your system and addressing visible damage promptly can save you from costly repairs down the road. Don’t hesitate to reach out to a technician for a thorough inspection. Ensuring your system is in good condition will help maintain comfort in your home, especially during those chilly months.
Persistent Error Codes on Digital Displays
If your heater displays persistent error codes, it’s a clear signal that something needs attention. Often, these codes indicate specific issues like airflow problems or electrical malfunctions, letting you know that your unit isn’t operating at its best. Addressing these codes promptly can help ensure your heating system operates safely and efficiently.
Many digital thermostats showcase error messages that can stem from various sources. For instance, a common code might relate to temperature sensors or communication errors between the thermostat and the heater. By taking the time to understand these codes, you can take the necessary steps to resolve issues before they escalate.
Ultimately, if you’re unable to resolve error codes on your own, it’s wise to call in a professional. They can diagnose the root cause and fix any underlying problems that may affect your unit’s performance. Don’t hesitate to seek help; it’s better to act early than deal with potentially bigger issues later on:
- Identify the specific error code displayed.
- Consult your heater’s manual for troubleshooting steps.
- Contact a professional for persistent issues or uncertainty.
Heater problems can catch you off guard, making timely repairs essential. Knowing how to prevent issues in the first place can save you time and money, so let’s talk about simple steps to keep your heater running smoothly.
Preventive Measures to Avoid Future Heater Issues
Preventive Measures to Avoid Future Heater Issues
Regular maintenance scheduling is key to keeping your heater running smoothly. Start with keeping air filters clean to ensure proper airflow and efficiency. Seasonal system check-ups can catch potential problems before they escalate. Ensure your thermostat functions well and follows best practices for efficient heater usage. Each of these steps can help prevent those frustrating heater malfunctions.
Regular Maintenance Scheduling
Regular maintenance scheduling is crucial for keeping your heater in top shape. By setting up routine check-ups, you can address potential issues before they turn into costly repairs. Think of it as a proactive approach to ensure your heating system runs smoothly when you need it most.
During these maintenance visits, a technician can inspect various components, clean filters, and test the overall functionality of your heater. This not only helps to prevent breakdowns but also improves your system’s efficiency, which can save you money on energy bills. Establishing this habit early will pay off in the long run.
To get the most out of your maintenance routine, consider these key steps:
- Schedule seasonal check-ups before the heating season.
- Change air filters regularly to ensure optimal airflow.
- Keep an eye on unusual noises or any changes in performance.
Keeping Air Filters Clean
Keeping air filters clean is one of the simplest yet most effective steps to prevent heater issues. When filters are clogged with dust and debris, airflow is restricted, which can lead to your heating system working harder than necessary. By checking and replacing your air filters regularly, you help maintain optimal performance and efficiency, ensuring your heater runs smoothly when you need it the most.
Regularly changing your air filters also contributes to better indoor air quality. A clean filter reduces allergens and dust circulating in your home, creating a healthier environment for you and your family. Plus, it can prolong the lifespan of your heating system, saving you from unexpected repairs down the line.
To stay on top of your air filter maintenance, consider setting reminders on your calendar. A simple monthly check can go a long way in preventing heater malfunctions. Here’s a quick checklist to keep in mind:
- Inspect your air filter every month.
- Replace the filter if it looks dirty or clogged.
- Set a reminder for yourself to keep up with changes.
Seasonal System Check-Ups
Scheduling seasonal system check-ups is a smart way to keep your heater running at its best. These regular inspections help catch minor issues before they escalate into major problems, ensuring your heating system operates efficiently when you need it most. A qualified technician can assess all key components, from filters to electrical connections, and perform necessary maintenance tasks.
When you prioritize these seasonal check-ups, you not only improve your heater’s performance but also extend its lifespan. For instance, technicians can clean or replace filters, which helps maintain optimal airflow and keeps your energy bills in check. Regular maintenance allows your system to run more smoothly, minimizing the chances of those frustrating no-heat moments.
Don’t underestimate how a little proactive care can go a long way in avoiding future heater issues. If you keep an eye on your system and ensure it’s inspected regularly, you’re likely to enjoy a cozy home all winter long. Investing in seasonal check-ups pays off by enhancing your comfort and saving you from unexpected repair costs down the line.
Ensuring Proper Thermostat Functionality
Ensuring proper thermostat functionality is a key part of preventing future heater issues. Start by making sure your thermostat is installed correctly and not in a location that gets direct sunlight or drafts. These factors can lead to inaccurate temperature readings, causing your heater to misinterpret when it should turn on or off.
Next, regularly check the thermostat settings to confirm they align with your heating needs. If you prefer a cozy home during winter, set the temperature higher than the current room temperature. A quick glance can prevent unnecessary headaches when your heater doesn’t respond as expected because of an overlooked setting.
Finally, testing your thermostat‘s responsiveness occasionally can help catch any issues early. You can do this by adjusting the temperature to see if your heater kicks on as intended. If your heater still doesn’t activate after adjustments, it might be time to consult a professional to ensure your heating system is ready to keep you warm all season long.
Tips for Efficient Heater Usage
Using a programmable thermostat can be a game changer for keeping your heater running efficiently. By setting specific heating schedules, you ensure that your system only works when you really need it. This not only saves energy but also helps you maintain a cozy environment without overworking your heater.
Another key tip for efficient heater usage is to avoid blocking vents and radiators with furniture or drapes. This keeps airflow unobstructed and allows warmth to circulate effectively throughout your home. You’ll notice a significant difference in the comfort levels when air can flow freely to all corners of your space.
Lastly, keep an eye on the temperature setting on your thermostat. Setting it just a few degrees lower when you’re away can make a big impact on your energy bills without sacrificing too much comfort. By being mindful of these small adjustments, you can ensure your heating system operates smoothly and efficiently throughout the colder months.
Your heater needs care and attention to keep it running well. Let’s look at the different types of heating systems so you can choose the one that fits your home best.
Understanding Different Types of Heating Systems

When dealing with a heater that won’t turn on, it’s helpful to understand the various types of heating systems in your home. This section covers gas and electric heaters, outlining their pros and cons. You’ll also learn unique troubleshooting tips for heat pumps, how to identify issues with radiant heating systems, and the impact smart thermostats can have on heater performance.
Overview of Gas and Electric Heaters
Gas heaters are a popular choice for many homes due to their efficiency and quick heating capabilities. They use natural gas or propane to generate heat, which means they can warm up a space faster compared to electric heaters. If you notice your gas heater won’t ignite, checking the pilot light and gas supply is essential as these are often the main culprits for heating issues.
On the other hand, electric heaters offer an easy setup, relying on electricity to produce warmth. They typically require less maintenance than gas options but can be less efficient in large spaces. If you find your electric heater isn’t operating as it should, checking the thermostat settings and ensuring the power supply is intact should be your first steps.
Each heating system has unique characteristics that can impact how they operate, so understanding these differences can help you troubleshoot effectively when faced with heater issues. Whether you have a gas or electric unit, recognizing the specific components and potential problems common to each type will make it easier for you to identify solutions and maintain a comfortable home environment.
Pros and Cons of Each Heating System
Gas heaters are often favored for their quick and efficient heating capabilities. They provide warmth rapidly and can be more cost-effective in areas where natural gas is available. However, you should be aware that gas heaters require regular maintenance and the need to watch for issues like pilot light problems or gas supply interruptions.
Electric heaters, on the other hand, are simpler to set up and generally require less upkeep than their gas counterparts. They can be great for smaller spaces or supplemental heating. The downside is that electric systems may not heat larger areas as effectively and can lead to higher energy bills if overused.
Each heating system has its quirks that can impact your troubleshooting efforts. Whether you’re dealing with a gas or electric heater, familiarize yourself with the common issues each type faces. This knowledge will not only help you resolve minor issues more easily but also assist you in scheduling regular maintenance to keep your home comfortable all winter long.
Unique Troubleshooting for Heat Pumps
When troubleshooting heat pumps that won’t turn on, start by checking the thermostat settings. Make sure it’s set to the “heat” mode and the temperature is above the current room temperature. A simple misconfiguration could prevent your heat pump from activating.
Next, inspect your heat pump‘s outdoor unit for any obstructions. Leaves, snow, or debris can block airflow, making it difficult for the system to function properly. Regular cleaning around the unit helps maintain efficiency and ensures your heat pump runs smoothly.
If these steps don’t resolve the issue, consider looking at the system’s electrical components. Check for tripped circuit breakers or blown fuses, as these can disrupt power to your heat pump. Addressing power issues promptly can save you from larger problems later on:
- Verify thermostat settings to ensure proper operation.
- Clear any debris or obstructions from the outdoor unit.
- Inspect electrical components for any signs of malfunction.
Identifying Issues With Radiant Heating Systems
When dealing with radiant heating systems, a good starting point is checking the thermostat settings. Ensure it’s set to the “heat” mode and that the desired temperature is above the current room temperature. If the thermostat isn’t configured correctly, it won’t signal your system to kick on, leaving you in the cold.
Next, examine the system’s valves and controls. If there are manual shut-off valves in your radiant heating setup, confirm they are open. Sometimes you might find a valve accidentally closed during maintenance, which can prevent hot water from flowing through the heating pipes, hindering your system’s ability to warm your space.
Don’t forget to look for air trapped in the system. Radiant heating relies on a steady flow of water, and when air bubbles form in the pipes, they can block heat transfer. Bleeding the system to release air can often resolve this issue, allowing your heater to function effectively. By keeping an eye on these areas, you can troubleshoot radiant heating issues and maintain a cozy environment in your home.
When Smart Thermostats Affect Heater Performance
When you’re dealing with a heater that won’t turn on, a smart thermostat might be the hidden culprit. These advanced devices rely on complex settings and programming, which means if they’re not configured correctly, your heating system may not get the signal to operate. To avoid this, double-check your thermostat settings, ensuring it’s set to heat at a temperature higher than the current room temperature.
If your smart thermostat has recently updated its software or settings, it could be affecting performance. Sometimes, updates can change how the device communicates with your heating system, leading to unexpected shutdowns or failures to engage. To regain control, accessing the thermostat‘s manual settings or app to verify the focus configuration can help you troubleshoot and keep your heater running as it should.
Lastly, if you have multiple zones managed by smart thermostats, remember that they need to work together seamlessly. If one zone is set incorrectly, or if a thermostat disconnects from Wi-Fi and loses its connectivity, that can prevent the heater from activating across the board. Keeping an eye on your system’s connectivity and individual settings is essential to ensure your home stays warm and comfortable during the colder months.
Now that you know about the various heating systems, understanding how to keep them running smoothly is next. Let’s look at some helpful resources for troubleshooting your heater and keeping your home warm.
Helpful Resources and Guides for Heater Troubleshooting

For effective heater troubleshooting, you can access valuable resources designed to aid in maintaining your heating system. Check out our DIY guide for common heating problems to troubleshoot effectively at home. Video tutorials will walk you through heater maintenance and recommended tools that simplify repair tasks. Don’t miss our seasonal checklists for heater preparation and links to manufacturer support for additional guidance.
These resources empower you with practical insights to ensure your heater operates efficiently and keeps you warm when needed. Explore how easy you can manage these common issues and maintain your comfort all season long.
DIY Guide for Common Heating Problems
If you’re dealing with a heater that won’t turn on, a DIY guide can be your best friend for common heating problems. Start by checking simple things like ensuring the thermostat is set correctly, and that the batteries are fresh. A small oversight can lead to unnecessary stress, and often, it’s just a quick fix that’ll have your heater running again.
Another handy aspect of a DIY guide is troubleshooting potential electrical issues. You can easily check the circuit breaker for any flips or blown fuses that might prevent your heater from functioning. Just having a basic understanding of these common problems can help you avoid service calls for issues you can fix yourself.
Lastly, a DIY guide can guide you through regular maintenance tips, such as cleaning your heater’s air filters and ensuring vents are unobstructed. These simple steps not only enhance performance but can also prolong the life of your heating system. Taking these proactive measures will help you maintain a warm and comfy home all season long without unexpected interruptions.
Video Tutorials on Heater Maintenance
If you’re having heater trouble, video tutorials can be a lifesaver. They provide visual step-by-step guidance to help you understand common maintenance tasks, like checking your air filter or troubleshooting your thermostat. Watching a quick video can give you confidence and clear instructions to tackle those heater issues more effectively.
Many video tutorials focus on easy maintenance techniques that anyone can do at home. For instance, you can learn how to clean or replace air filters, inspect your vents, or reset your thermostat. These practical demonstrations help you see exactly what to do, making the process less intimidating and ensuring your heater continues to run smoothly.
Beyond basic maintenance, some tutorials explore more complex issues, such as identifying system sounds or checking for leaks. These videos can guide you through various situations, helping you pinpoint problems before they escalate. By utilizing these resources, you can preserve the functionality of your heater and ensure your home stays warm and cozy throughout the chilly months:
| Common Maintenance Tasks | Video Examples | Benefits |
|---|---|---|
| Replacing Air Filters | Step-by-step filter replacement | Improves airflow and efficiency |
| Checking Thermostat Settings | Adjusting thermostat instructions | Ensures accurate temperature control |
| Troubleshooting Noises | Identifying sounds and solutions | Helps prevent further complications |
Recommended Tools for Heater Repair
When your heater isn’t turning on, having the right tools can make a big difference in troubleshooting the issue. A multimeter is essential for checking electrical continuity and verifying that your thermostat and power connections are functioning. This handy device lets you ensure that power is flowing where it should, saving you from unnecessary guesswork.
Another useful tool is a screwdriver set, particularly since you’ll likely need to tighten or remove screws in various components of your heating unit. Having a set of screwdrivers can help you quickly access important parts, whether you’re checking the igniter in a gas heater or inspecting mechanical components in an electric model. Being equipped reduces the time spent searching for the right tool when you need immediate access for repairs.
Lastly, don’t overlook the value of a comprehensive HVAC manual or troubleshooting guide specific to your heater model. These resources provide guidance on common issues and solutions, helping you navigate problems more effectively. Such manuals can empower you with the knowledge to confidently make adjustments or repairs that keep your home warm and comfortable, ensuring you’re ready for those colder months ahead.
Checklists for Seasonal Heater Preparation
Preparing your heater for the colder months is essential to ensure it runs smoothly whenever you need it. Start by scheduling a seasonal check-up to catch any issues before the winter rush. Having a professional assess your heating system can save you from those last-minute breakdowns when temperatures drop.
Next, creating a checklist can help you stay organized. Include tasks like changing air filters, checking for any blockages in vents, and making sure your thermostat is functioning properly. By regularly completing these tasks, you not only optimize heater performance but also improve energy efficiency, helping you save on utility bills.
Lastly, keep an eye on any unusual noises or changes in how your heater operates. If you notice signs that something’s off, don’t hesitate to address them promptly. Staying proactive can prevent minor issues from snowballing into bigger problems, keeping your home warm and comfortable all season long:
| Checklist Item | Details | Frequency |
|---|---|---|
| Change Air Filters | Replace filters to ensure airflow. | Every month |
| Check Thermostat | Confirm settings and functionality. | Seasonally |
| Professional Check-up | Schedule a full system evaluation. | Yearly |
Links to Manufacturer Support and Manuals
If you’re facing a stubborn heater that refuses to turn on, accessing manufacturer support and manuals can be incredibly helpful. Most heating system brands provide online resources that include troubleshooting guides and user manuals, allowing you to quickly locate the information you need. This direct access can save you time and provide specific solutions tailored to your heater model.
Manufacturer websites often feature FAQs and troubleshooting sections dedicated to common heater issues. By navigating these resources, you’ll usually find step-by-step instructions for resolving problems without having to call a technician. This hands-on approach gives you immediate answers, helping you get back to enjoying a warm, comfortable home in no time.
It’s also a good idea to check if there’s a customer support hotline available. Whether you need clarity on manual instructions, or if a deeper issue requires professional intervention, speaking directly with a support representative can guide you to ensure your heating system operates without a hitch. Don’t hesitate to rely on these resources — they are there to assist you:
- Visit manufacturer websites for manuals and troubleshooting guides.
- Explore FAQs that address common heater issues.
- Utilize customer support hotlines for expert advice.