

Table Of Contents:
Is your furnace struggling to keep your home warm? Don’t sweat it—you’re not alone in facing HVAC issues, especially during colder months. In this post, you’ll learn effective DIY repair techniques to troubleshoot common furnace problems, gather essential tools, and perform maintenance to keep your system running smoothly. By following these steps, you can tackle minor repairs confidently and prevent costly heating repair bills. If your furnace breaks down or leaks, you’ll also find tips to avoid water damage and know when to call in the pros from NewRiseHVAC.com for help.
Key Takeaways
- Identifying signs of furnace inefficiency can help you prevent costly repairs
- A clean furnace enhances performance and indoor air quality
- Monitor gas supply to avoid potential safety hazards
- Know when to seek professional help to prevent worsening issues
- Regular maintenance, like filter changes, extends the lifespan of your heating system
Identify Common Furnace Problems
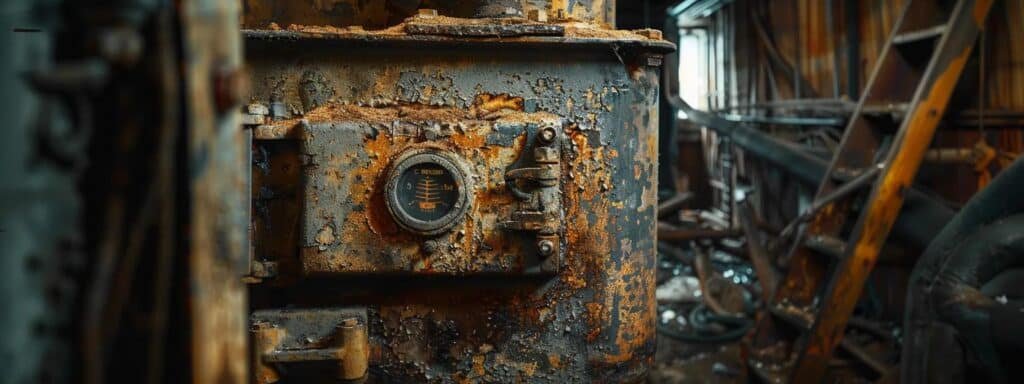
Identifying common furnace problems is your first step toward effective DIY repairs. Look for signs of inefficiency, such as poor heating or uneven temperatures, which need your attention. Distinguishing between minor and major issues can save you time and potential expenses. Pay close attention to temperature fluctuations and any unusual noises, as these may indicate contamination. Don’t forget to keep your unit clean; a quick vacuum can make a difference! For more information, visit newrisehvac.com.
Recognize Signs of Inefficiency
When you notice that certain areas of your home are not heating up as they should, this is a red flag of inefficiency. You might want to run a quick checklist to see if your furnace is working as it should. Keep an eye on the temperature difference between rooms and ensure the metal vents are clear of any obstructions that might be hindering air flow.
A common issue that can arise between heating cycles is a power outage, which can leave your furnace struggling to function properly. After a power outage, your unit may not restart correctly, impacting its efficiency. If this happens, check if there’s any unusual noise during operation, as this may indicate a deeper problem with the natural gas supply or internal components.
Finally, if your energy bills seem higher than usual, that’s a strong indicator that your furnace isn’t operating efficiently. Take note of how often the furnace runs and if it’s getting excessively warm to the touch. Addressing these signs promptly can help you avoid costly repairs down the line:
| Sign of Inefficiency | Actions to Take |
|---|---|
| Cold spots in the home | Check vents and ensure they are not blocked. |
| Unusual noises | Inspect system for loose parts or gas supply issues. |
| Higher energy bills | Assess furnace performance and schedule a professional checkup if necessary. |
Distinguish Between Minor and Major Issues
When tackling furnace issues, it’s vital to differentiate between minor and major concerns. Minor problems, like a blown fuse or a voltage issue, can often be fixed with simple do it yourself methods, such as replacing necessary parts or resetting your thermostat. On the other hand, if you notice persistent heating problems accompanied by sounds that seem out of the ordinary, it may point to a more serious issue requiring professional help.
Another telltale sign of a significant problem is the presence of carbon monoxide. If your furnace is malfunctioning, this toxic gas could be seeping into your home. Investing in a carbon monoxide detector is a must, as it will alert you to any dangers. If your detector goes off, prioritize safety and call in an expert immediately.
As you work on home improvement projects, knowing when to seek assistance can save you time and money. For example, issues like a malfunctioning air purifier connected to your system may require a deeper dive into the internal workings of your furnace. Trust your instincts—if a problem feels beyond your expertise, it’s usually best to consult a professional to avoid further complications.
Understand the Impacts of Temperature Fluctuations
When you notice temperature fluctuations in your home, it can be a sign that something isn’t quite right with your furnace. This inconsistency may be due to a cracked heat exchanger, which can affect your unit’s performance and safety. If you’re comfortable with tools, grab a screwdriver and take a closer look at your furnace to identify any visible issues that might require your attention.
Temperature changes can also hint at underlying problems within your boiler or heating system. If your furnace is struggling to maintain a steady temperature, it might be working overtime, which can lead to increased wear and tear. By addressing these fluctuations quickly, you can prevent the situation from escalating, saving you from costly repairs down the road.
Another aspect to consider is how your tank‘s pressure levels can affect temperature stability. If there’s a noticeable drop in heat output, check the pressure gauge and make sure it’s within the recommended range for efficient operation. Maintaining proper pressure not only helps with temperature consistency but also enhances your system’s overall performance and safety.
Identify Unusual Noises From the Furnace
When your furnace starts making unusual noises, it’s often a sign that something needs your attention. Sounds like banging, rattling, or hissing could indicate debris stuck in the system or issues with the compressor. Listening closely can help you determine the source of the noise and whether it’s a minor fix or something that requires professional help.
A noisy furnace can also suggest that the compressed air in your system is not circulating properly. If you hear a constant whistling or whooshing sound, it might be time to check your ducts for blockages or consider adjusting your programmable thermostat settings. Addressing airflow issues sooner rather than later can greatly enhance your furnace’s efficiency.
Ignoring odd noises may lead to bigger problems later on. For example, persistent groaning could signal that internal parts are wearing down or require lubrication. Taking action to identify and resolve these noises can help extend the lifespan of your heating system, ensuring you stay warm and comfortable without incurring unexpected repair costs.
Now that you’ve spotted those common furnace issues, it’s time to roll up your sleeves. Gather the right tools, and you’ll be ready to tackle those repairs with confidence.
Gather Essential Tools for DIY Repairs
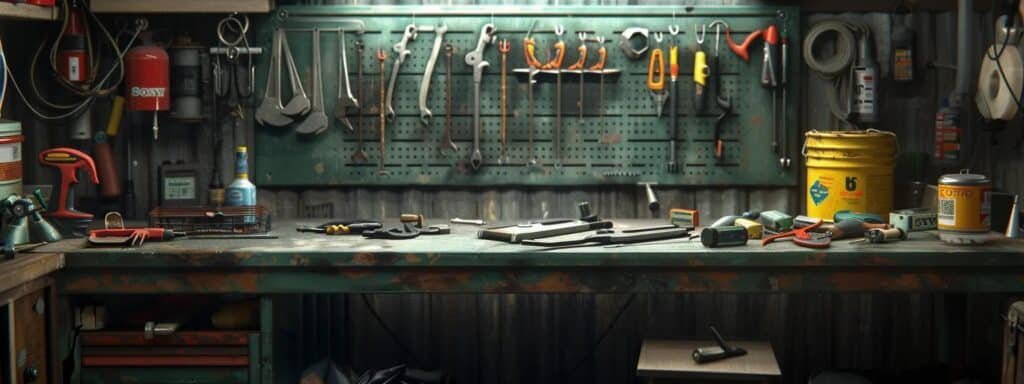
To effectively troubleshoot your furnace, it’s essential to gather the right tools for basic repairs. Start by assembling necessary items like screwdrivers, pliers, and a multimeter. Don’t forget to include safety equipment and cleaning supplies, especially for maintaining your combustion chamber and ensuring proper airflow. Organize your workspace to make the task easier as you work on furnace and duct maintenance.
List Necessary Tools for Basic Repairs
When you’re gearing up for some DIY repairs on your furnace, having the right tools in your arsenal is crucial. A multimeter is one of those must-haves—this handy device allows you to test electrical components and troubleshoot any electrical issues seamlessly. By measuring voltage and resistance, you can pinpoint problems quickly, making your repair process much smoother.
Another essential tool is a good-quality lubricant. Over time, moving parts in your furnace can wear down and create friction, leading to noise and inefficiency. Applying lubricant to these parts can help keep your system running smoothly and extend its lifespan. Remember, a well-maintained furnace is not only more efficient, but it also saves you money on energy bills.
If your furnace has a built-in humidifier, keep a pump handy for maintenance. This tool will help ensure that your humidifier operates effectively, promoting better air quality in your home. Also, consider having some refrigerant on hand if your heating system uses it—this way, you’ll be prepared to handle any potential cooling issues, especially during those warmer months when the heat might be cranked up.
Ensure Safety Equipment Is Available
When you’re troubleshooting your furnace, having safety equipment on hand is essential. Before diving into any repairs, make sure you have a quality pair of safety goggles and gloves. These items will protect your eyes and hands from any debris or harmful substances you might encounter while working on your machine. It’s always better to be safe than sorry!
One critical safety measure you can’t overlook is having a carbon monoxide detector installed in your home. This device will alert you to any dangerous levels of carbon monoxide that could result from a malfunctioning furnace. If you ever smell gas or notice your detector going off, stop your troubleshooting efforts immediately and evacuate the area, as this indicates a serious issue that requires professional assistance.
Don’t forget to check any gaskets or seals on your furnace before starting repairs. Ensuring these components are in good condition can prevent carbon leaks and maintain the efficiency of your heating system. By taking these simple precautions and equipping yourself with the right safety gear, you’ll not only protect yourself but also enhance the overall effectiveness of your DIY repair efforts.
Prepare Cleaning Supplies for Maintenance
When getting ready to clean your furnace, having the right supplies on hand makes a big difference. You’ll want to gather items like a vacuum with a brush attachment, which is great for removing dust and debris from both the furnace and ductwork. Regularly cleaning this area helps maintain efficiency and prevent issues that may arise from accumulated exhaust gas, ensuring your unit runs smoothly.
Don’t forget to stock up on microfiber cloths and gentle cleaning solutions for wiping down surfaces. Keeping electrical wiring free from dust not only promotes safety but also enhances the performance of your heating system. A clean furnace can significantly improve air quality, so it’s worth taking the time to maintain it regularly.
Lastly, consider adding a soft-bristle brush to your toolkit. This tool is perfect for targeting hard-to-reach areas where dirt tends to settle. By ensuring your furnace and air conditioning units are well-maintained, you’re investing in their longevity and efficiency, minimizing the need for extensive HVAC troubleshooting down the line.
Organize Your Workspace
Organizing your workspace is a fundamental step in tackling HVAC maintenance successfully. You’ll want to clear any clutter around your furnace area, creating a dedicated space that is both safe and efficient for your DIY repairs. This not only helps you locate tools quickly but also minimizes the risk of accidents, especially when you’re dealing with sensitive components like the heat exchanger.
Having a clean and structured workspace allows you to focus on the task at hand, reducing stress and improving your efficiency. Consider using storage bins or labeled containers to keep your tools and supplies organized. When everything is in its place, you can avoid potential issues like mold growth from damp cleaning supplies that may accidentally go unnoticed in a disorganized area.
Moreover, a well-organized environment encourages you to perform regular HVAC repairs and maintenance, ultimately extending the longevity of your system. By dedicating time to keep your workspace tidy, you’re setting yourself up for success in your repair efforts. Plus, knowing where everything is when you need to address a furnace issue will save you time and eliminate frustration during those crucial moments when you need to act fast.
With your tools in hand, you are ready to face the challenge ahead. Next, we’ll look at simple steps to troubleshoot your system and get things back on track.
Perform Basic Troubleshooting Steps

Start by checking the thermostat settings to ensure your heating system is set correctly. Next, inspect the power supply to the furnace to confirm it’s receiving electricity. If you have a gas furnace, make sure the gas supply is on. Finally, take a moment to examine fuses and circuit breakers to rule out any interruptions. These simple steps form the foundation for effective HVAC repair and can help identify basic issues before diving into more complex troubleshooting.
Check the Thermostat Settings
Before diving into more complicated furnace repairs, it’s smart to check your thermostat settings. Make sure your thermostat is set to ‘heat’ and the temperature is higher than the current room temperature. Sometimes, a simple adjustment is all that’s needed to kick your furnace back into gear.
If you notice humidity levels are higher than normal in your home, it could mean your air handler isn’t working effectively. This might also be your cue to double-check if the thermostat is properly communicating with your HVAC system. A malfunctioning thermostat can prevent the air handler from operating efficiently, leading to discomfort and potential issues down the line.
Don’t forget to inspect the circuit breaker too. If the breaker has tripped, you may need to reset it for your furnace to function correctly. Ensuring your thermostat has power and is correctly configured not only helps avoid surprises but can also prevent issues like gas leaks, which can occur if your heating system fails to turn on or operates intermittently.
Inspect Power Supply to the Furnace
One of the first things you should do when troubleshooting your furnace is to inspect the power supply. Make sure that the furnace is plugged in and that the power switch is in the ‘on’ position. It’s also a good idea to check your circuit breaker to see if a blown fuse or tripped breaker could be the reason your system isn’t starting.
If your furnace is gas-powered, ensure that the gas supply is on and that there are no issues with the igniter or ignition system. Sometimes, dust buildup around the sensor or ignition components can prevent proper operation. A quick cleaning can often fix these minor issues, getting your furnace back up and running smoothly.
Don’t forget to look at the chimney as well. If there’s any obstruction, like debris, it may prevent your furnace from functioning correctly. Ensuring that the chimney is clear allows proper exhaust and airflow, which is essential for maintaining the efficiency of your heating system and preventing potential hazards.
Confirm Gas Supply Is on for Gas Furnaces
Before you dive into any troubleshooting, make sure the gas supply to your furnace is turned on. Check the gas valve near your furnace—it should be in the open position. If the valve is off, simply turn it on and see if that gets your heating system working again.
While you’re at it, inspect the thermostat settings to confirm everything is correctly set. If your thermostat isn’t properly communicating with the furnace, you could have issues even if the gas supply is on. If you hear clicking sounds but the system doesn’t turn on, you may have a faulty limit switch that’s interrupting the gas flow.
Finally, if you suspect there may be clogs in the gas line, it’s worth using a wire brush to clear out any obstructions around the connections. Regular maintenance can help keep your furnace efficient, preventing the need for costly repairs. Addressing these simple checks can save you time and ensure your home stays warm during winter. Remember, safety is key, so always have a carbon monoxide detector installed, just in case.
Examine Fuses and Circuit Breakers
When you’re experiencing furnace issues, one of the first things to examine is the fuses and circuit breakers. A blown fuse can prevent your system from receiving power, so check your fuse box and circuit panel for any signs of wear or damage. If you notice any tripped breakers, resetting them may be an easy fix to get your furnace running again.
While you’re at it, keep an eye out for any unusual odors, especially if your furnace uses propane as a fuel source. A strong smell similar to rotten eggs is a sign of a potential gas leak, and in such cases, it’s crucial to turn off the gas supply immediately. This kind of smell can often interfere with your system’s operation, so don’t hesitate to address this concern with urgency.
Remember to also consider the thermocouple, which plays a critical role in your furnace’s functionality. A faulty thermocouple can disrupt the gas flow and prevent the furnace from heating your space adequately. As you troubleshoot, checking the electrical connections and ensuring they are tight can make a significant difference in the overall performance of your system.
You’ve checked the basics and given your furnace a fighting chance. Next, you’ll want to clean and maintain its inner workings to keep it running strong.
Clean and Maintain Furnace Components

Maintaining your furnace is key to preventing HVAC problems and ensuring efficient heat transfer in your home. Start by changing or cleaning the filter to boost indoor air quality. Next, vacuum dust and debris from the blower and burner compartments to keep the heating element functioning optimally. Don’t forget to clear any blockages from vents and ducts, and inspect and clean the flame sensor for better performance.
Change or Clean the Furnace Filter
Changing or cleaning your furnace air filter is an essential task that can significantly improve your system’s efficiency. A dirty or clogged air filter restricts airflow, which can lead to more strain on your furnace and increase the risk of failure. Regular inspections of your air filter every month ensure that your furnace runs smoothly and helps maintain good indoor air quality.
To clean or replace your filter, start by turning off the furnace and locating the air filter compartment, usually near the return duct. If you’re cleaning the filter, use a soft brush or vacuum to remove dust and debris. After this quick inspection, you can either put the filter back or replace it if it’s too dirty, securing your system’s performance without any hassle.
A clean air filter not only helps your furnace function effectively but also keeps the pilot light burning steadily. This can prevent potential issues such as the pilot light going out, which could lead to more significant heating problems down the line. Remember, regular maintenance saves you money and gives you peace of mind:
- Inspect filter monthly.
- Clean or replace as needed.
- Keep your furnace running efficiently.
Vacuum Dust and Debris From Blower and Burner Compartments
Keeping your furnace clean is crucial for maintaining its efficiency, and one of the most effective ways to do this is by vacuuming dust and debris from the blower and burner compartments. Dirt and soot can accumulate in these areas, leading to reduced airflow and increased strain on your system. A clogged blower can result in higher energy bills, so taking this simple step can significantly enhance your furnace‘s performance.
Before you begin vacuuming, be sure to turn off the power to your furnace and remove any access panels carefully. Use a vacuum cleaner with a brush attachment to reach into the blower and burner compartments, ensuring that you remove any buildup. It’s also a good practice to conduct an energy audit after cleaning to see if your furnace is running more efficiently, especially if you have a smart thermostat that tracks energy usage.
A clean furnace can help prevent issues such as blown fuses caused by overheating or mechanical strain. Regularly removing dirt and soot not only contributes to better airflow but also helps avoid costly repairs down the line. Whether you’re troubleshooting issues or just performing routine maintenance, keeping these areas tidy will make a noticeable difference in your furnace‘s operation:
| Furnace Component | Maintenance Action |
|---|---|
| Blower | Vacuum dust every couple of months. |
| Burner | Remove soot buildup annually. |
| General System | Conduct energy audit regularly. |
Clear Vents and Ducts of Blockages
Clearing vents and ducts of blockages is a crucial step in effective furnace repair and ensuring your heating system operates efficiently. Over time, dust, debris, and even pet hair can accumulate in the ventilation pathways, reducing airflow and making your furnace work harder than necessary. This can not only lead to higher energy bills but also increase the risk of hazards like overheating or system failure.
To begin, inspect your vents for any visible obstructions. You can use a brush to gently remove dirt or particles that are lodged in the vents. A solution of vinegar and water can be helpful for cleaning surfaces, as it effectively cuts through grime without causing damage. Regular maintenance, including clearing these blockages, can significantly improve ventilation and keep your furnace running smoothly.
After you’ve cleared the vents, take some time to check the ducts as well. Ensuring ductwork is free of blockages will enhance airflow throughout your home, leading to better heating performance. Remember, a little maintenance goes a long way in extending the lifespan of your system and preventing costly repairs:
- Inspect vents for debris.
- Use a brush for cleaning.
- Apply a vinegar solution if necessary.
- Check ductwork for blockages.
Inspect and Clean the Flame Sensor
To keep your furnace running smoothly, it’s essential to inspect and clean the flame sensor regularly. This small component plays a big role in detecting whether the flame is burning properly. If you notice your furnace is cycling on and off or not lighting at all, grab a flashlight and take a closer look at the flame sensor—dirty sensors can hinder efficiency.
Cleaning the flame sensor is relatively simple. Start by turning off your furnace for safety and removing the sensor with basic tools. Wipe it down with a soft cloth, or for tougher grime, lightly apply some oil to help loosen the debris without damaging the sensor. A clean flame sensor can help maintain steady pressure in the system, preventing unnecessary wear and tear.
If you’re unsure about handling this task, it might be worth consulting a technician, especially if your furnace still shows issues after cleaning the sensor. Regular maintenance not only saves you from costly repairs but also ensures your heating system operates at its best, providing comfort when you need it most. Don’t overlook this small component—keeping it clean can significantly boost your furnace‘s overall performance.
With the furnace clean and ready, small issues may still need your attention. Let’s take a look at some common repairs you can tackle yourself.
Address Common DIY Repairs

When it comes to keeping your HVAC system running smoothly, addressing common DIY repairs can save you time and money. You can learn how to replace a blower motor, fix a noisy furnace blower, repair or replace a faulty thermostat, and reignite a gas furnace pilot light. Knowing these techniques will help you reduce wear and tear on your system and keep it efficient, all while ensuring you stay within your warranty coverage.
By using tools like a vacuum cleaner for cleaning tasks and understanding when to call for emergency service, you equip yourself for effective troubleshooting. Let’s dive into each repair technique and empower you to tackle these issues with confidence.
Replace a Blower Motor
Replacing a blower motor can seem daunting, but it’s a manageable task if you keep a few things in mind. Start by disconnecting power to your furnace, ensuring safety is a priority. You’ll want to inspect the motor for signs of corrosion or wear, especially on the capacitor and valve connections. If you notice any issues, getting a new motor is the next step. Make sure to note the specifics of your current motor, like the model number and specifications, to ensure you select the right replacement.
Once you get the new blower motor, follow these steps to install it properly. Remove the fan assembly by detaching the hose or any mounting brackets that hold it in place. You’ll need to disconnect the wiring harness connected to the motor, which can sometimes be tricky due to tight spaces. Take your time here; a misconnection could lead to further issues later on, so it’s worth being thorough. Once everything is detached, you can easily replace the old motor with the new unit, reconnecting everything just as it was.
After installation, it’s crucial to test the new motor for proper operation. Reconnect the power supply and turn your furnace back on. Look for any unusual noises or vibrations during startup, as these can indicate that something is off with your installation. If everything runs smoothly, you’ll have successfully replaced your blower motor, boosting your furnace’s efficiency without needing to call in an HVAC technician. This kind of repair not only saves you money but also enhances your understanding of your heating system, making you feel more in control of your home environment.
Fix a Noisy Furnace Blower
If your furnace blower is making strange noises, it could be a sign that something is off. Start by ensuring that all wires and connections are secure; loose wires can cause rattling sounds as the unit operates. If you notice any frayed or damaged wires, it’s best to replace them promptly to avoid further complications.
Next, check for any obstructions that may be causing the noise. Sometimes, items can get sucked into the blower, creating a loud clattering sound. Clear away any debris from around the furnace and within the blower area, as this can help restore quiet operation.
Finally, listen for signs of wear in the blower motor. A noisy motor could indicate that it needs lubrication or repairs. If you hear a grinding or squealing noise, it may be time to lubricate the bearings or, in some cases, replace the motor entirely. Tackling these common issues can lead to a quieter and more efficient furnace:
- Check and secure all wires.
- Remove any debris around the blower.
- Lubricate the blower motor as needed.
Repair or Replace a Faulty Thermostat
When facing heating issues, the thermostat is one of the first components you should check. A faulty thermostat can prevent your furnace from operating efficiently or even cause it to stop working entirely. If your furnace isn’t heating your home properly, ensure the thermostat is set to the correct temperature and is in heat mode; this simple check can often resolve the problem quickly.
If you discover that your thermostat is still misbehaving after making sure it’s set correctly, you might consider repair or replacement. Sometimes, recalibrating the thermostat can fix inaccuracies in temperature readings. However, if it’s old or broken, investing in a new one can improve your system’s overall efficiency and comfort levels in your home.
Before replacing your thermostat, ensure you gather the necessary tools and follow safety procedures. Start by turning off the power to your HVAC system to avoid any electrical hazards while working on the unit. By addressing this common DIY repair, you can tackle temperature issues effectively and keep your furnace running smoothly:
- Check the thermostat settings.
- Inspect for any signs of damage.
- Consider recalibration or replacement if necessary.
- Turn off power before making adjustments.
Reignite a Gas Furnace Pilot Light
If your gas furnace isn’t heating your home, the pilot light might be the culprit. The first step in reigniting the pilot light is to locate the reset button or pilot light assembly, which is usually near the burner. Before you proceed, it’s essential to turn off the gas supply and wait a few minutes to allow any gas to dissipate.
Once you’ve ensured that it’s safe, follow the manufacturer’s instructions for your furnace model. Typically, you’ll need to turn the dial to ‘pilot’ and press the reset button while using a long lighter or match to carefully ignite the pilot flame. Keep your hand clear of any components that could cause injury.
After the flame is lit, hold the button for a few seconds to ensure it stays ignited, and then release. If you’re successful, turn the dial back to ‘on’ and check to see if your furnace starts heating up. If the pilot light goes out again, it may indicate a more significant issue, and you might want to consult a professional for assistance. Remember these key steps to reignite your furnace pilot light:
- Turn off the gas supply and wait.
- Follow the specific instructions for your model.
- Carefully ignite the pilot light using a long lighter.
- Hold the reset button after lighting.
- If the flame goes out, consider calling a professional.
You can handle many repairs on your own, but some issues require more than just elbow grease. It’s important to know when to call in the experts to keep your home safe and comfortable.
Know When to Seek Professional Help
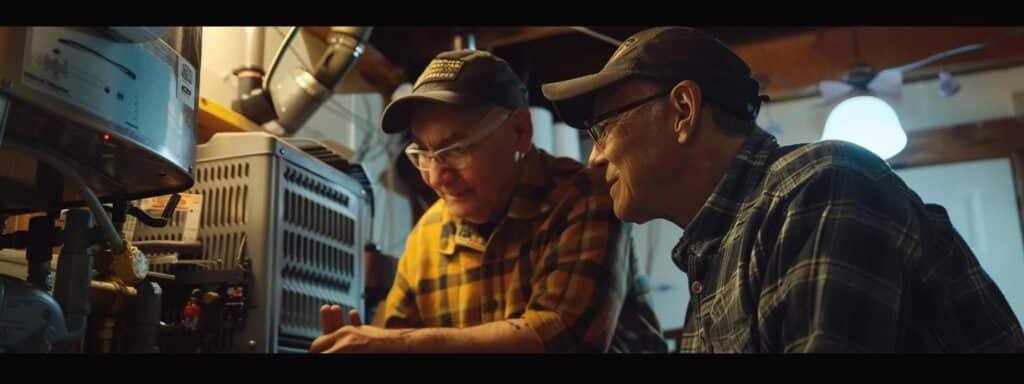
Know When to Seek Professional Help
Recognizing when it’s time to call in a professional can save you from headaches and ensure your furnace is in safe hands. Look for warning signs that indicate serious issues, understand the risks associated with advanced repairs, and weigh the costs of DIY fixes against professional services. If needed, we’ll also help you find reputable HVAC technicians for a hassle-free experience.
Recognize Warning Signs Indicating a Professional Is Needed
When your furnace starts showing signs of trouble, like persistent strange noises or no heat at all, it’s time to consider professional help. These warning signs often indicate underlying issues that are beyond simple fixes, suggesting that deeper maintenance or replacement might be necessary. If you hear sounds like banging or clattering that persist, it’s a good idea to bring in an expert to avoid worsening the problem.
Another red flag is the presence of a gas smell near your furnace. This could indicate a gas leak, which poses a serious safety risk. If you detect this scent, shut off the gas supply immediately and evacuate your home, as this situation requires immediate intervention from a skilled technician to ensure the safety of your household.
Lastly, if your energy bills spike unexpectedly without a reasonable explanation, this could be a sign that your furnace is struggling to operate efficiently. Increased operational costs often reflect serious inefficiencies or malfunctions that are best handled by a professional. Scheduling an expert evaluation can help diagnose the issue and save you from more extensive repairs down the line.
Understand the Risks of Advanced Repairs
Trying to tackle advanced furnace repairs without adequate knowledge can lead to serious safety hazards. For instance, working on gas lines or electrical components can result in gas leaks or electrical shock if you’re not familiar with the systems in your furnace. It’s crucial to understand your limits and know that not every problem can be resolved with DIY skills. If you notice symptoms like unusual smells or erratic behavior, don’t hesitate to reach out to a professional.
Another risk is the potential for costly damage to your furnace. If you attempt to fix a complex issue without the right tools or understanding, you could accidentally worsen the problem, leading to much larger repair bills. For example, if you try to repair the heat exchanger without proper guidance, it might lead to complete furnace failure. It’s often more cost-effective to consult a trained technician than to gamble with a DIY approach on significant repairs.
Lastly, advanced repairs usually require specialized knowledge that most homeowners simply don’t possess. Areas like combustion analysis or electrical diagnostics are best left to professionals who have the training and experience to handle these situations safely. By letting qualified technicians handle these intricate issues, you ensure the job is done right the first time, and you can enjoy your heating system without worry:
- Recognize hazards associated with gas and electrical systems.
- Avoid escalating issues that may lead to high repair costs.
- Seek professional help for tasks beyond your expertise.
Evaluate the Cost of DIY vs. Professional Services
When deciding between DIY repairs and calling a professional for your furnace, it’s essential to evaluate the costs associated with each option. DIY repairs often require only basic tools and minimal expenses, making them an attractive option for homeowners looking to save money. However, if you aren’t confident in your abilities, it may lead to mistakes that result in even higher repair costs down the line.
On the other hand, professional services may initially seem more expensive, but they can ultimately save you money by addressing issues effectively the first time. Experienced technicians can quickly spot underlying problems that a DIYer might overlook, preventing further damage to your heating system. For instance, hiring a technician for a thorough inspection may uncover vital issues before they escalate, keeping your repair bills in check.
Consider this: if a DIY repair leads to more significant problems, you might end up spending more than you would have on professional services. Weigh the potential costs of mishaps against the convenience and peace of mind you get when you rely on a seasoned expert. Finding the right balance between DIY efforts and professional help can enhance your furnace‘s efficiency and longevity:
- Assess the complexity of the issue.
- Consider your skill level and tool availability.
- Evaluate the potential costs of further damage.
- Weigh benefits of hiring a knowledgeable professional.
Find Reputable HVAC Technicians if Necessary
Finding a reputable HVAC technician can feel overwhelming, especially when you’re dealing with a malfunctioning furnace. A good starting point is asking friends, family, or neighbors for recommendations, as personal experiences often lead to valuable insights. You can also check online reviews and ratings on local HVAC companies to gauge their reliability and service quality.
Once you have a few names, look for certifications and licenses to ensure the technicians meet industry standards. This can make a significant difference in the quality of service you receive, especially during complex repairs. You want someone who has the expertise to address your specific furnace issues without cutting corners, giving you peace of mind as they work.
Don’t hesitate to interview potential technicians before making a decision. Ask about their experience with the type of furnace you have and what their process looks like for repairs. A qualified HVAC technician should be willing to answer your questions and provide a clear estimate before starting any work, ensuring transparency throughout your repair experience.